Advanced WordPress Website Options in Customizer
BoldGrid Tutorials
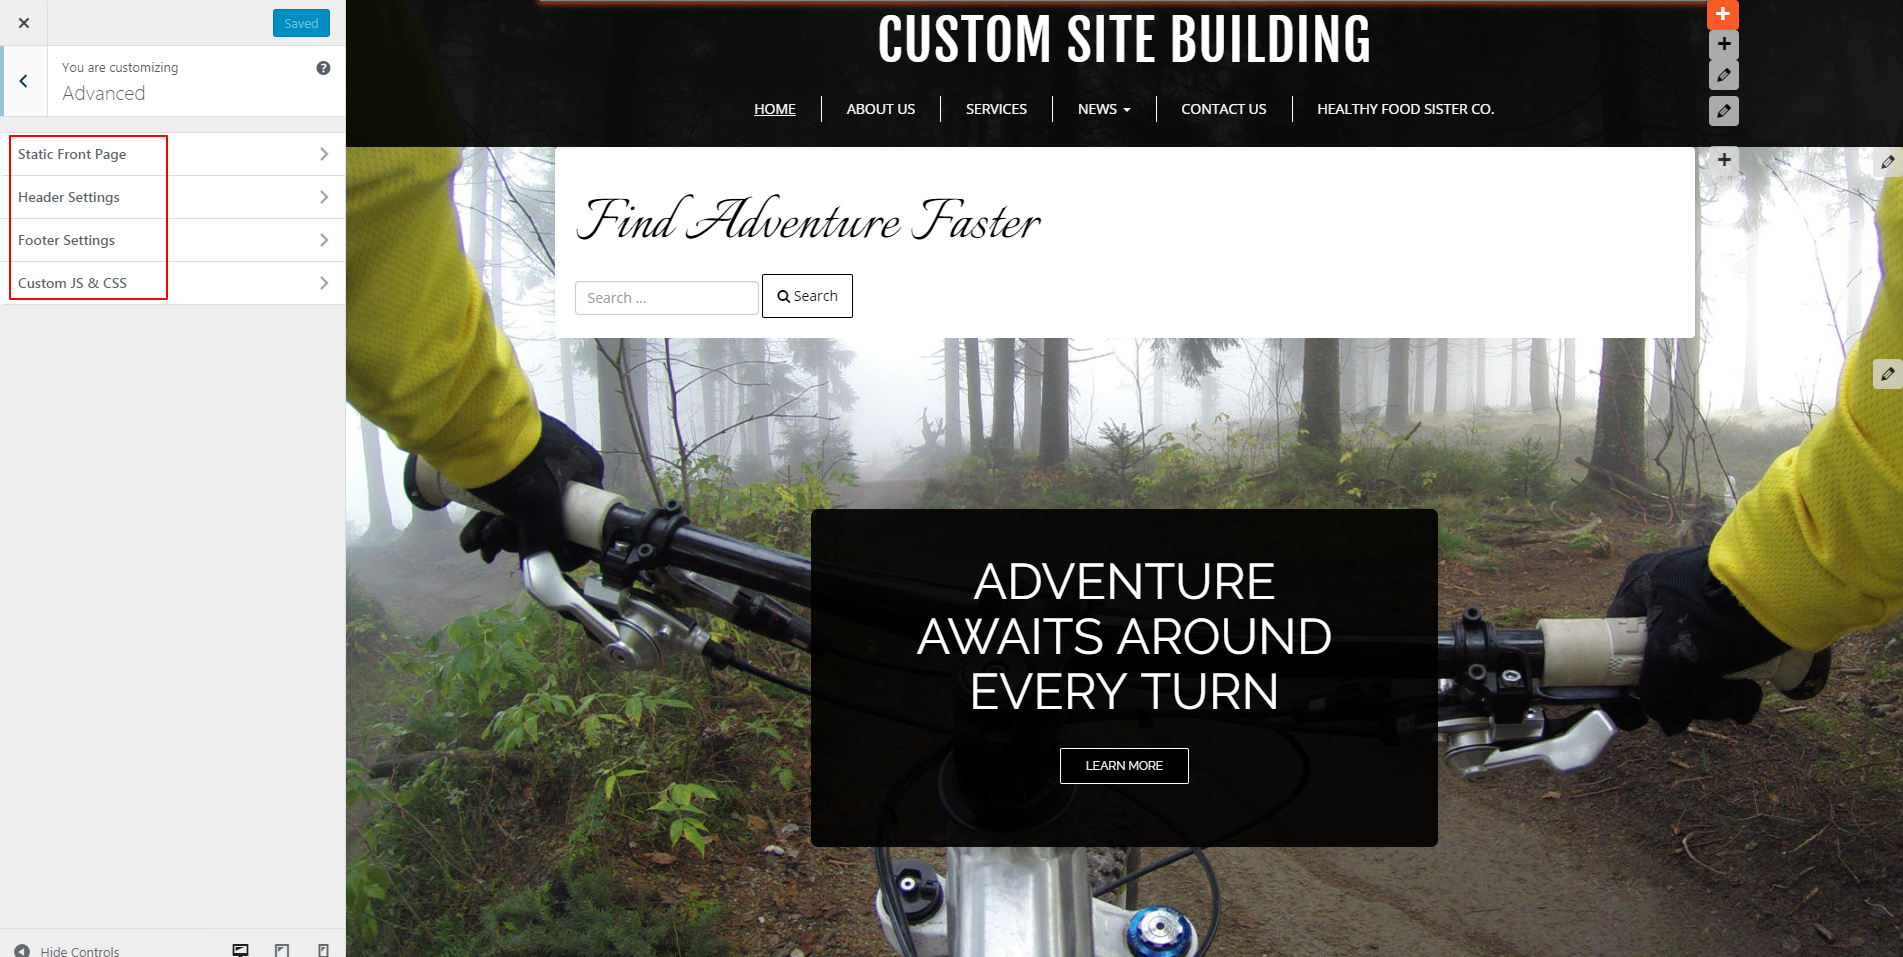
A great website builder for beginners, BoldGrid also provides great opportunities for expert web designers to build better websites. Our plugin makes it easy to set a static front page, add widget areas to your theme, and quickly add custom CSS and JavaScript code without editing core files. Open up your WordPress admin menu, and click “customize” from the left-hand side so we can dive into some advanced WordPress website options in “Customizer.”
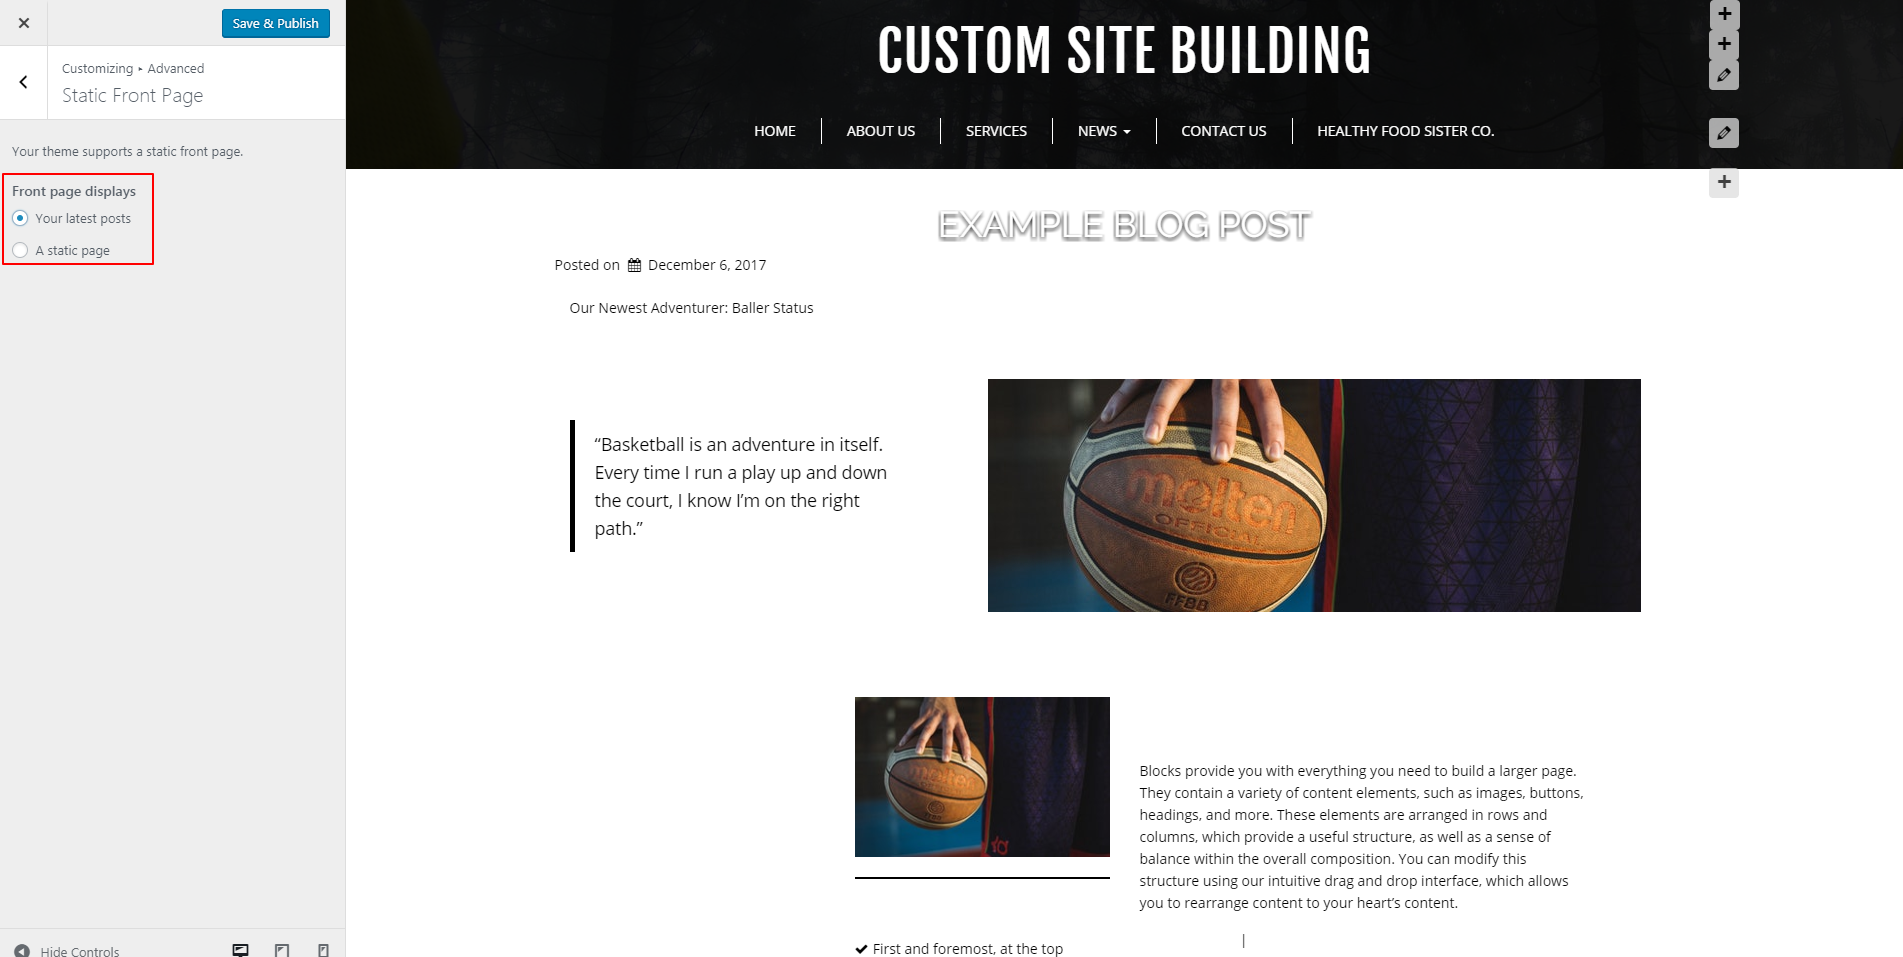
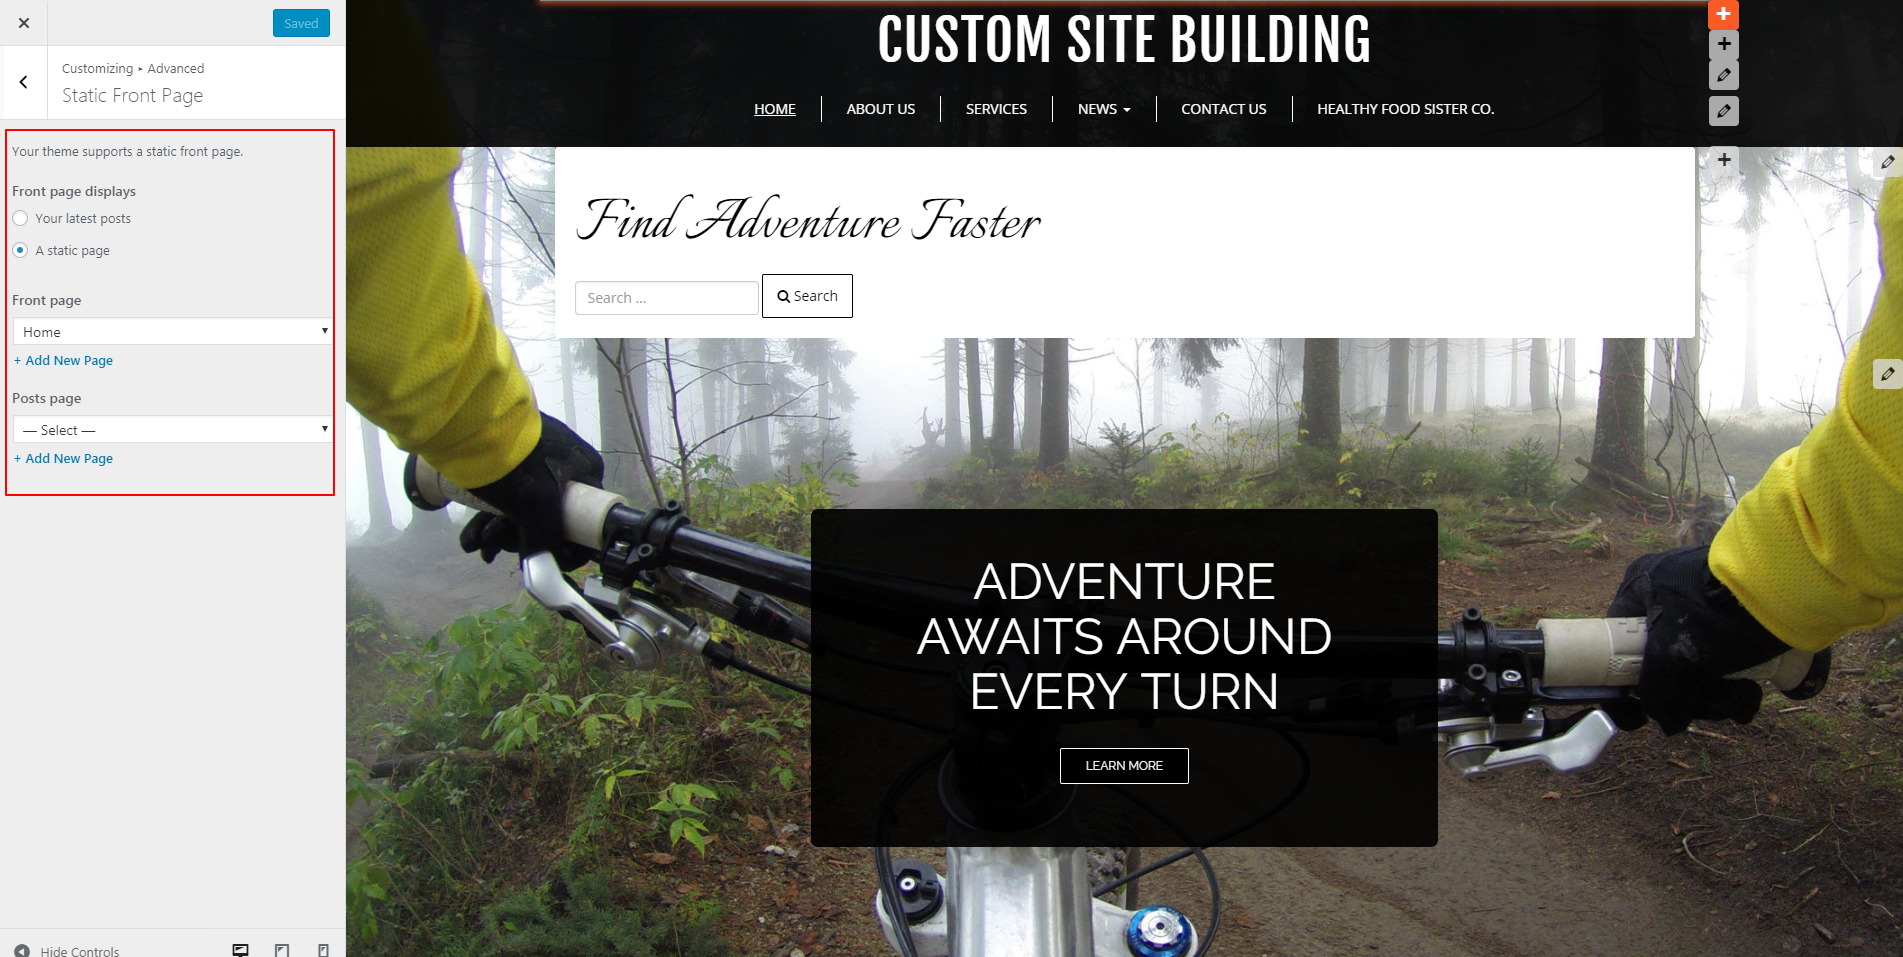 As shown above, the front page will display as “a static page,” meaning it will not change unless you edit it. This option serves as the default for most themes. However, if you blog, then changing your front page to “your latest posts” may prove an ideal way to keep people up to date on your latest entries. A “your latest posts” page updates automatically when you add new posts. This makes them dynamic versus static. To do this, just click the circle next to “your latest posts” to change the front page of your site.
 If you keep your front page static, you have the option to change your front page under this submenu. Whatever existing pages you have can serve as your front page simply by selecting it under the “Front Page” menu. You can also add a new page. Generally, people keep the front page as “Home,” but that choice is far from mandatory. Decide which page your audience will find most important for getting the right first impression of your brand, and select that as the front page. You also have the option to change your posts page to an existing page or add a new page under this option. To change the “front page” or “posts page” to an existing page, simply click the downward-facing carrot to see your options. Then, select and see the page change in Customizer.
 Once satisfied with your choices here, select “save & publish” at the top, then click the left-pointing carrot to go back to other advanced options in Customizer.
Header Settings in the Advanced Section of Customizer
Click on “Header Settings” to view the options displayed in the following image:
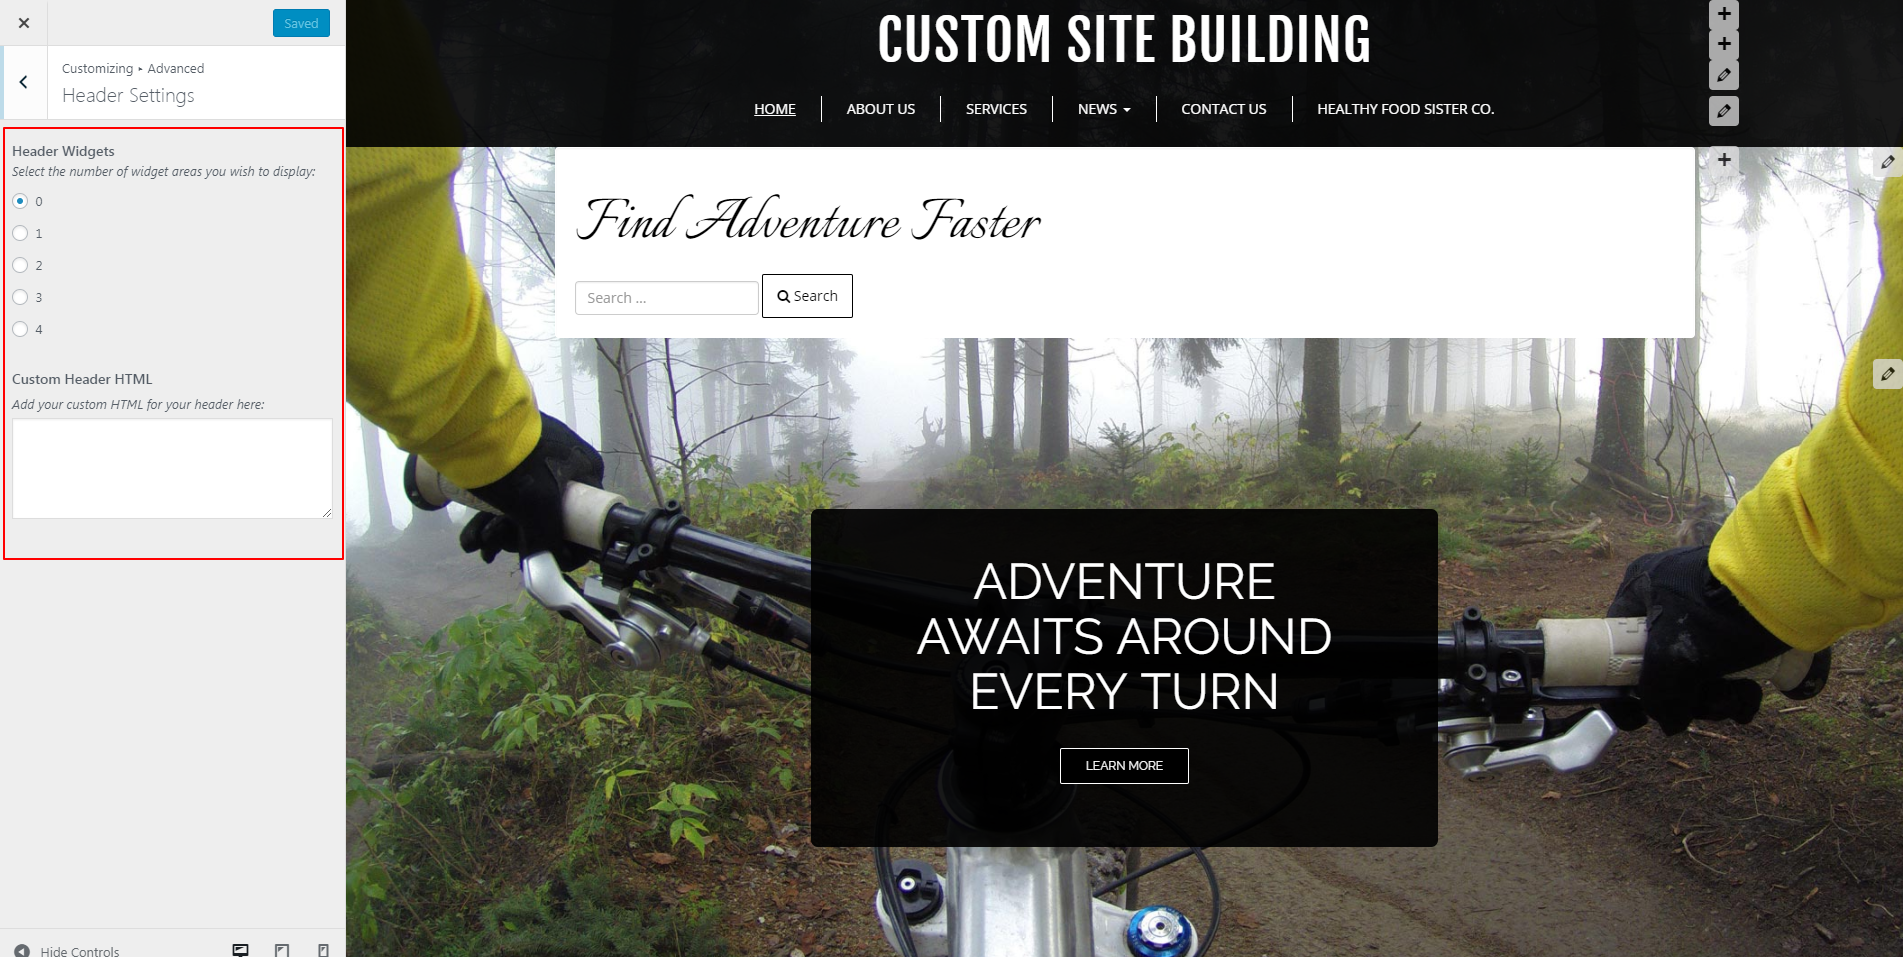 As you see, you can create additional widget areas in your header from this submenu. The “Widgets” menu provides further options. Click on this link to learn more about customizing website widgets in BoldGrid.
Footer Settings in the Advanced Section of Customizer
Again, click the left-pointing carrot to go back to more advanced options in Customizer, then click on “Footer Settings” to view this submenu:
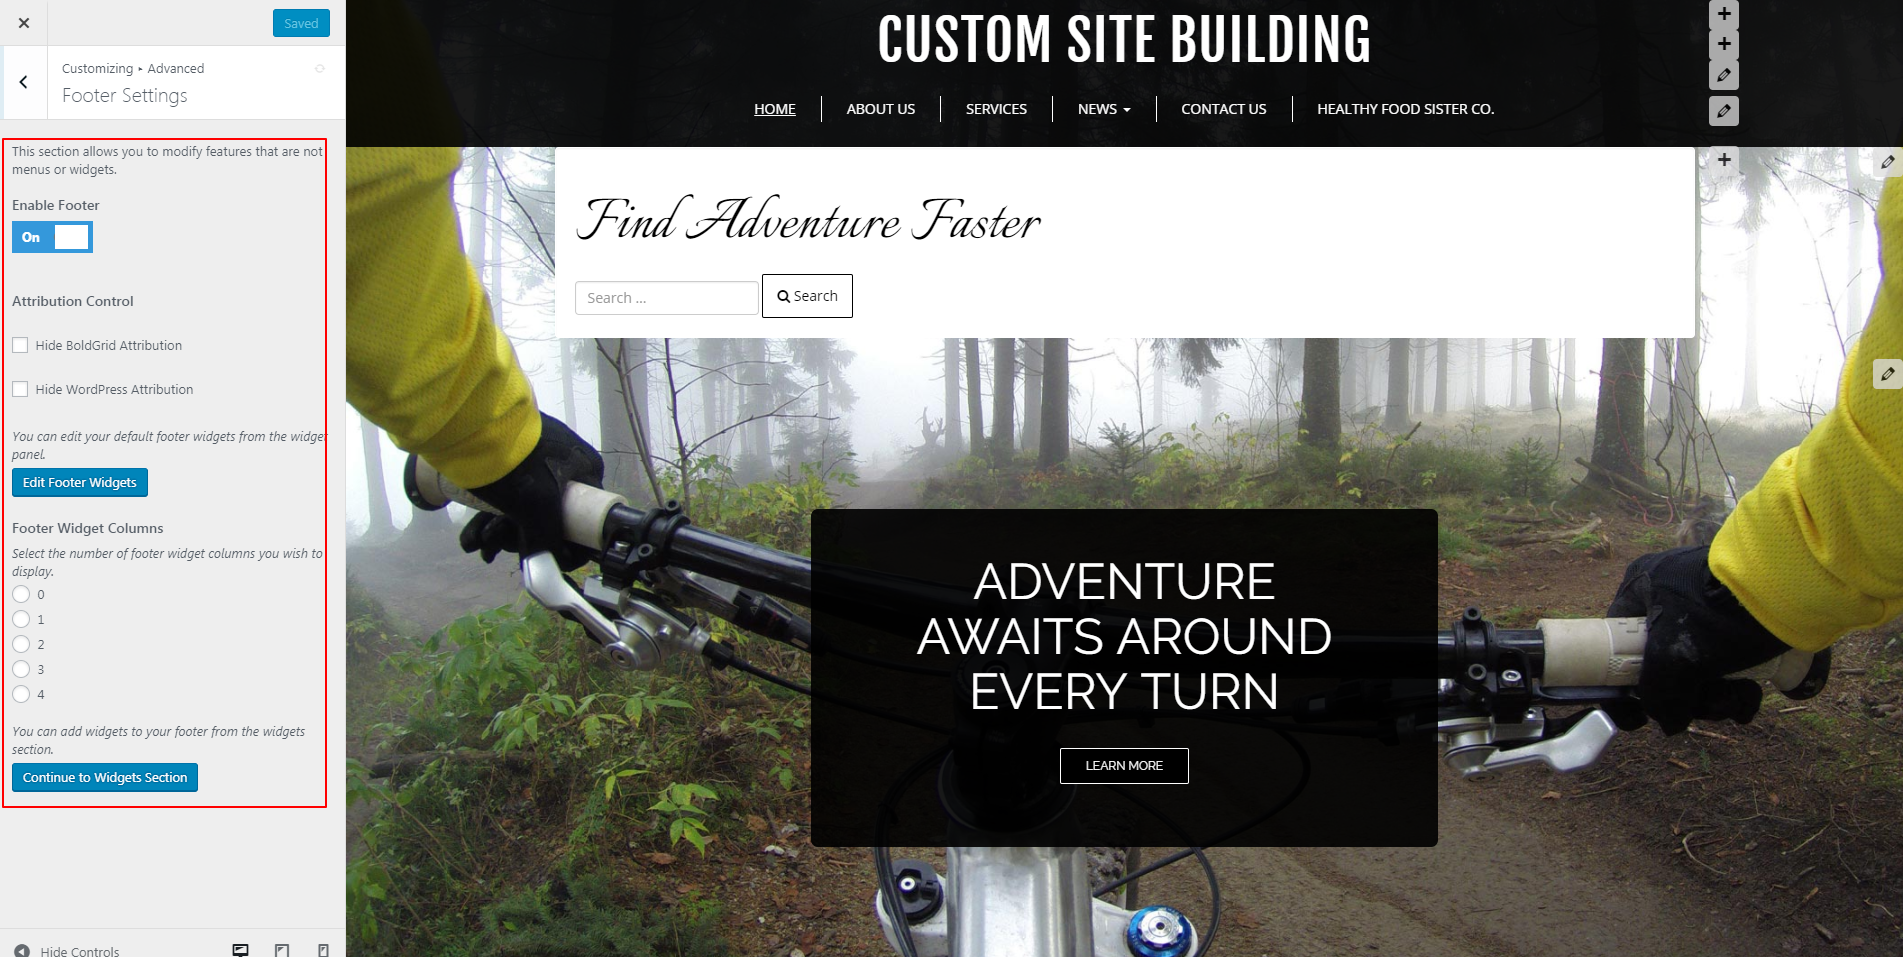 This brings you to another area where you can add more website widgets — just in the footer of your site instead. You also have “Attribution Control” to hide the text “Built with BoldGrid” and “Powered by WordPress” at the bottom of your site. To turn these attributions off or on, simply check the boxes next to the appropriate option.
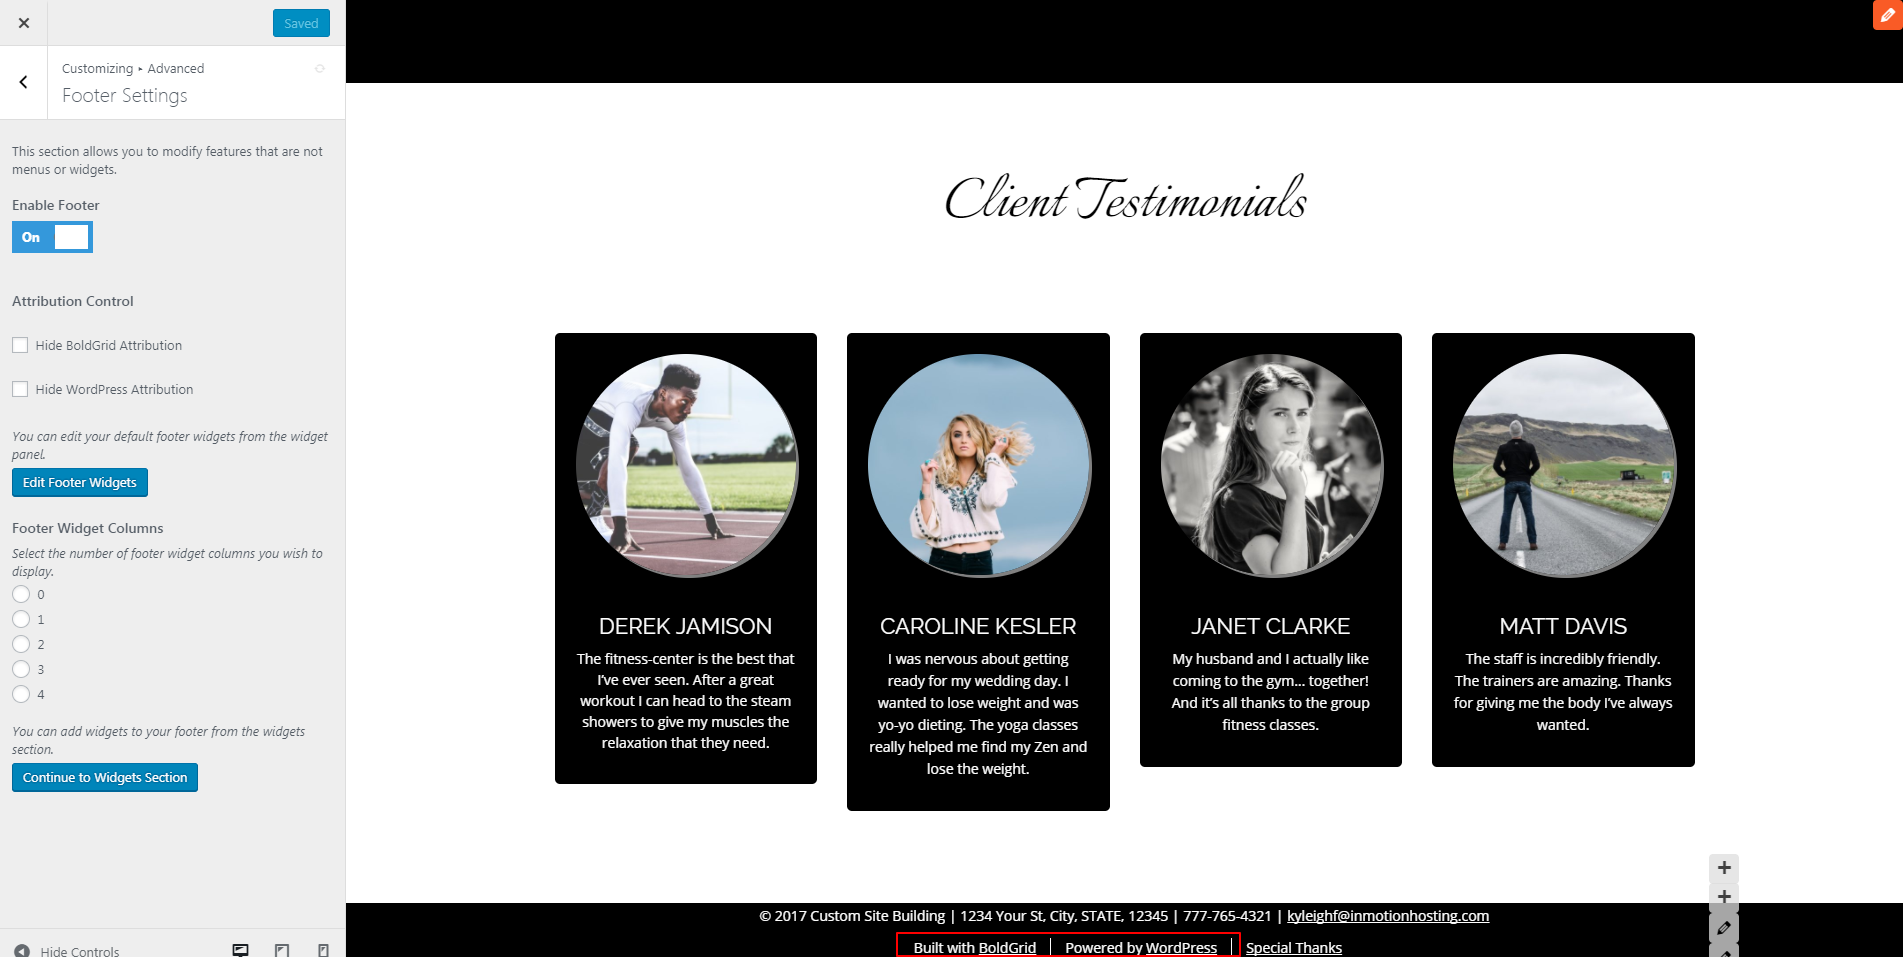 “Special Thanks” can only be removed if you have purchased a Premium Connect Key.
As always, if you have made changes in this submenu that you would like to keep, click “Save & Publish” from the top of the “Customizer” menu.
 This area in Customizer allows you to test out new code quickly and safely. It allows you to see the changes made without disabling your site. If you do not like what you see, you can remove the code easily. Your only limitation: you cannot modify menus or widgets within this submenu. Otherwise, click in those white boxes to customize the CSS or JavaScript in your themes.
At the bottom of the Customizer menu, click on “advanced” to see the options displayed here.

Static Front Page Options in Customizer
Click on “static front page” from the customizer menu to see these options: As shown above, the front page will display as “a static page,” meaning it will not change unless you edit it. This option serves as the default for most themes. However, if you blog, then changing your front page to “your latest posts” may prove an ideal way to keep people up to date on your latest entries. A “your latest posts” page updates automatically when you add new posts. This makes them dynamic versus static. To do this, just click the circle next to “your latest posts” to change the front page of your site.
 If you keep your front page static, you have the option to change your front page under this submenu. Whatever existing pages you have can serve as your front page simply by selecting it under the “Front Page” menu. You can also add a new page. Generally, people keep the front page as “Home,” but that choice is far from mandatory. Decide which page your audience will find most important for getting the right first impression of your brand, and select that as the front page. You also have the option to change your posts page to an existing page or add a new page under this option. To change the “front page” or “posts page” to an existing page, simply click the downward-facing carrot to see your options. Then, select and see the page change in Customizer.
 Once satisfied with your choices here, select “save & publish” at the top, then click the left-pointing carrot to go back to other advanced options in Customizer.
Header Settings in the Advanced Section of Customizer
Click on “Header Settings” to view the options displayed in the following image:
 As you see, you can create additional widget areas in your header from this submenu. The “Widgets” menu provides further options. Click on this link to learn more about customizing website widgets in BoldGrid.
Footer Settings in the Advanced Section of Customizer
Again, click the left-pointing carrot to go back to more advanced options in Customizer, then click on “Footer Settings” to view this submenu:
 This brings you to another area where you can add more website widgets — just in the footer of your site instead. You also have “Attribution Control” to hide the text “Built with BoldGrid” and “Powered by WordPress” at the bottom of your site. To turn these attributions off or on, simply check the boxes next to the appropriate option.
 “Special Thanks” can only be removed if you have purchased a Premium Connect Key.
As always, if you have made changes in this submenu that you would like to keep, click “Save & Publish” from the top of the “Customizer” menu.
Custom JavaScript & CSS Options in Customizer
Click the left-pointing arrow back to the advanced menu options, then click on the last submenu here: “Custom JS & CSS.”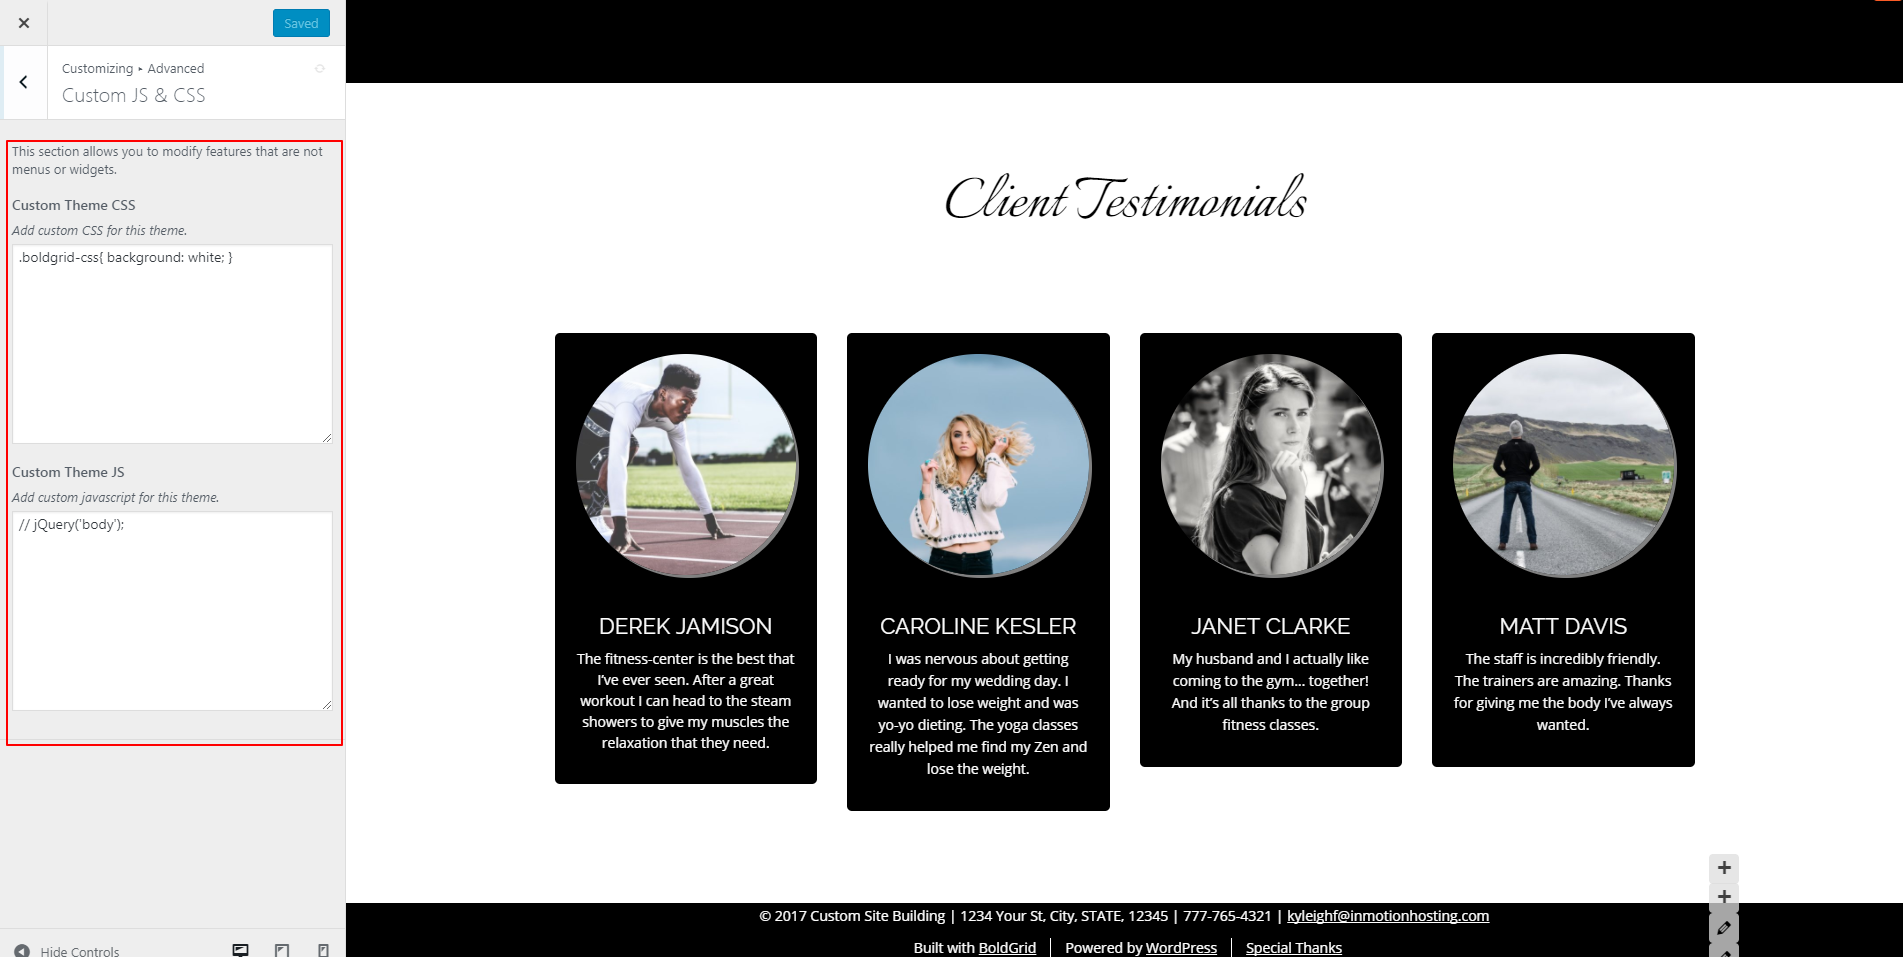 This area in Customizer allows you to test out new code quickly and safely. It allows you to see the changes made without disabling your site. If you do not like what you see, you can remove the code easily. Your only limitation: you cannot modify menus or widgets within this submenu. Otherwise, click in those white boxes to customize the CSS or JavaScript in your themes.