Customizing BackGrounds in BoldGrid
WordPress Page Builder
Congratulations! You have started a website and now you want to make it your own by customizing your background in BoldGrid. Personalizing your website reaps great rewards in establishing a brand or brand presence, it makes what you want to promote unique, and gives you a competitive edge. So, let’s start scaling it.
 Customizing Background Images
Some themes have an image that requires you to edit it on that specific page of your website using the Post and Page Builder (as opposed to the Customizer). For this example, we will use the Customizer.
Click on “Background” from the Customizer menu. You will see the current background image displayed in a thumbnail view. Below that, you can choose to remove or change the image. Click on “change image.”
 We suggest customizing your background image by uploading one of your own in order to distinguish it from other websites. But, you also have other options within your media library, allowing you to either choose an existing image or perform a BoldGrid Connect Search for a new one. BoldGrid Connect Search allows you to choose either images for purchase that come with a license, or free images to use at your discretion as the website owner. Type in the search bar on the top right to begin looking for relevant images to your website’s content.
We will upload our image to give it a more personalized look and feel. Click “upload files,” then either drag-and-drop the image or choose from your file folders. This should bring you to this page where you can determine attachment details like image size, title, description and more:
 After making your selection, BoldGrid will ask you to either crop the image or skip cropping altogether. Make your choice, then see the changes you made as you return to the Customizer page.
 When you are satisfied with the image changes, click “Save and Publish” at the top of the left-hand sidebar. After you save your changes, the button will become grayed out with the word “Saved.”
 Background Image Effects
From the Customizer menu, we make it easy for you to choose a scrolling effect in a way that lets you see how it works with the image and interacts with the page. BoldGrid will select the option “Fixed” by default, which keeps the image in a fixed position as you scroll. Choosing “Parallax” for the background image allows it to move at a slightly different speed than the foreground content. Choosing “Scroll” will cause the image to scroll along with the rest of the page’s content. See this portion of our How to Customize Background in BoldGrid video for examples of these effects in action.
BackGround Image Sizes and Positions
On the left-hand sidebar, you also have the option to scale the image to a different size and position. Play around with it a bit to figure out what works best for the image you have chosen in the context of your page.
BoldGrid selects “Cover Page” by default for this theme, meaning it spans across the entirety of the web page. “Scaled to fit” will fit the image to your current view, but — depending on the size of the image relative to the page — it may leave a bit of white space (as it did to the right in the following screenshot).
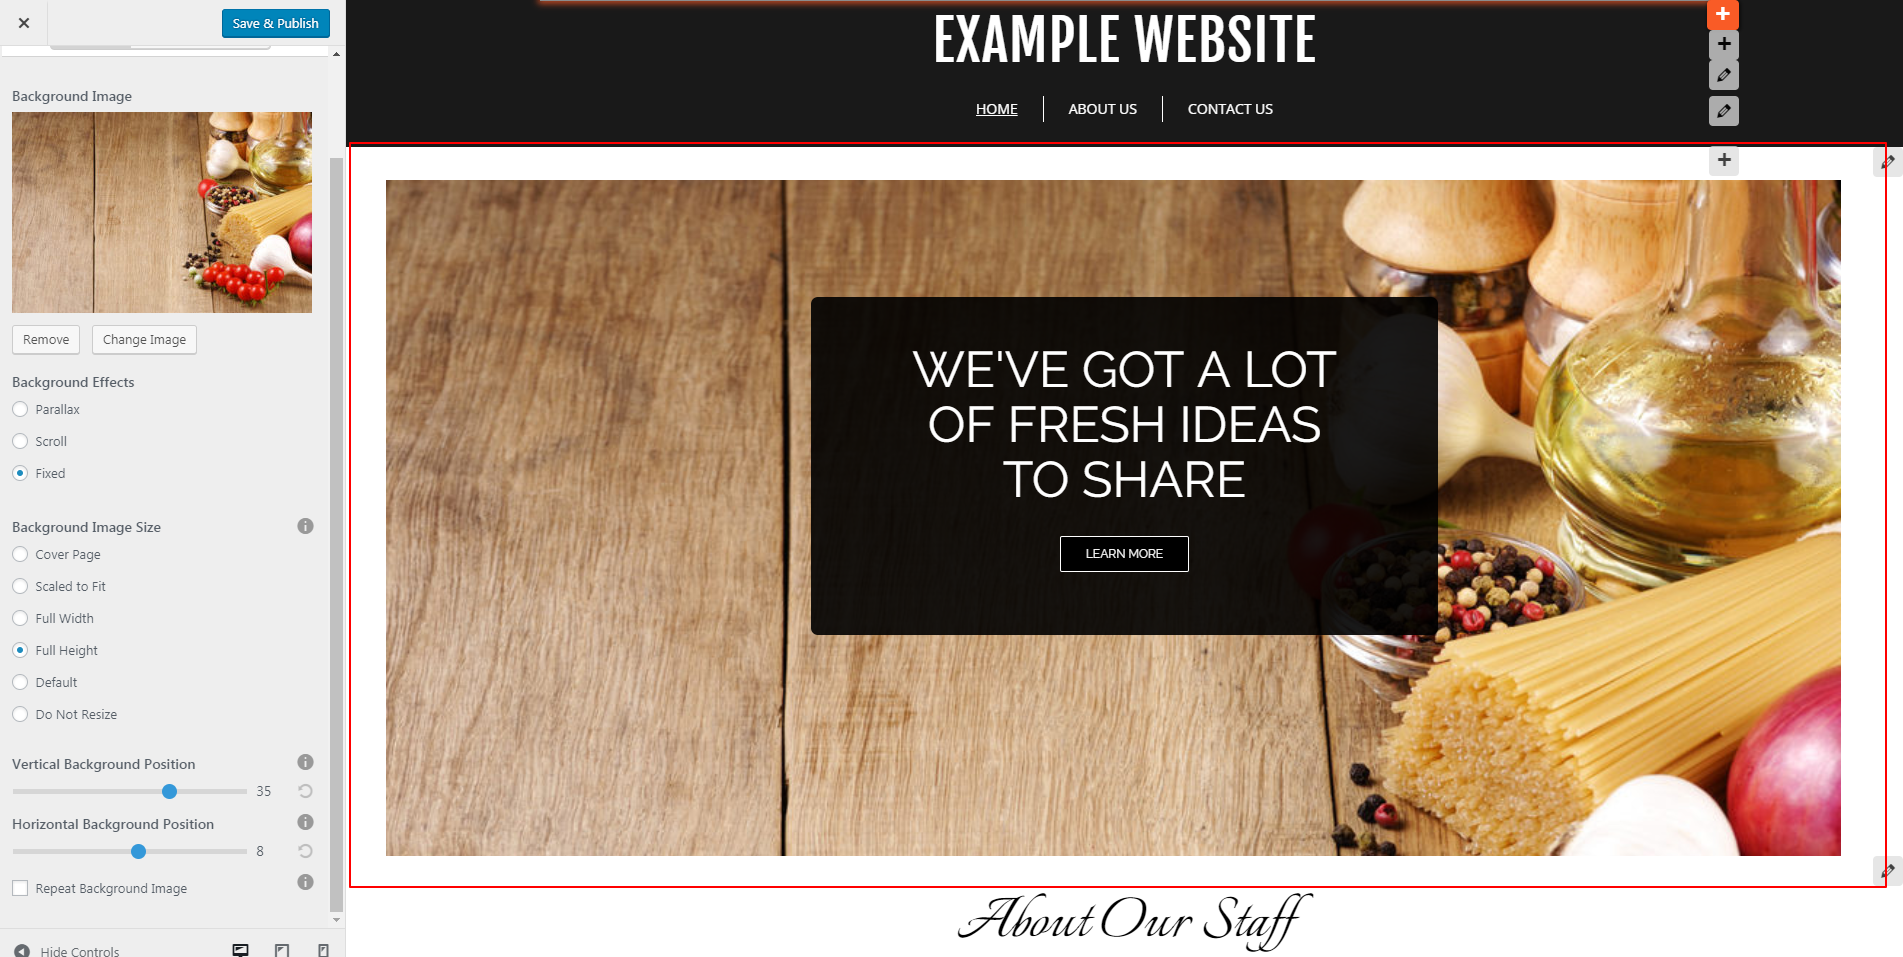
 The “Full Width” option will fill the entire horizontal frame, while “Full Height” fills to the highest vertical point of the page. For this example, the same issue occurs as shown above where using that sizing effect creates white space on the white side. However, when you play around with the Vertical or Horizontal Background Position, you can manipulate the image a bit further by moving it up or down with Vertical Background Position, or right or left with Horizontal. The image displayed below shows how we created more equivalent whitespace around the image with those positioning options.
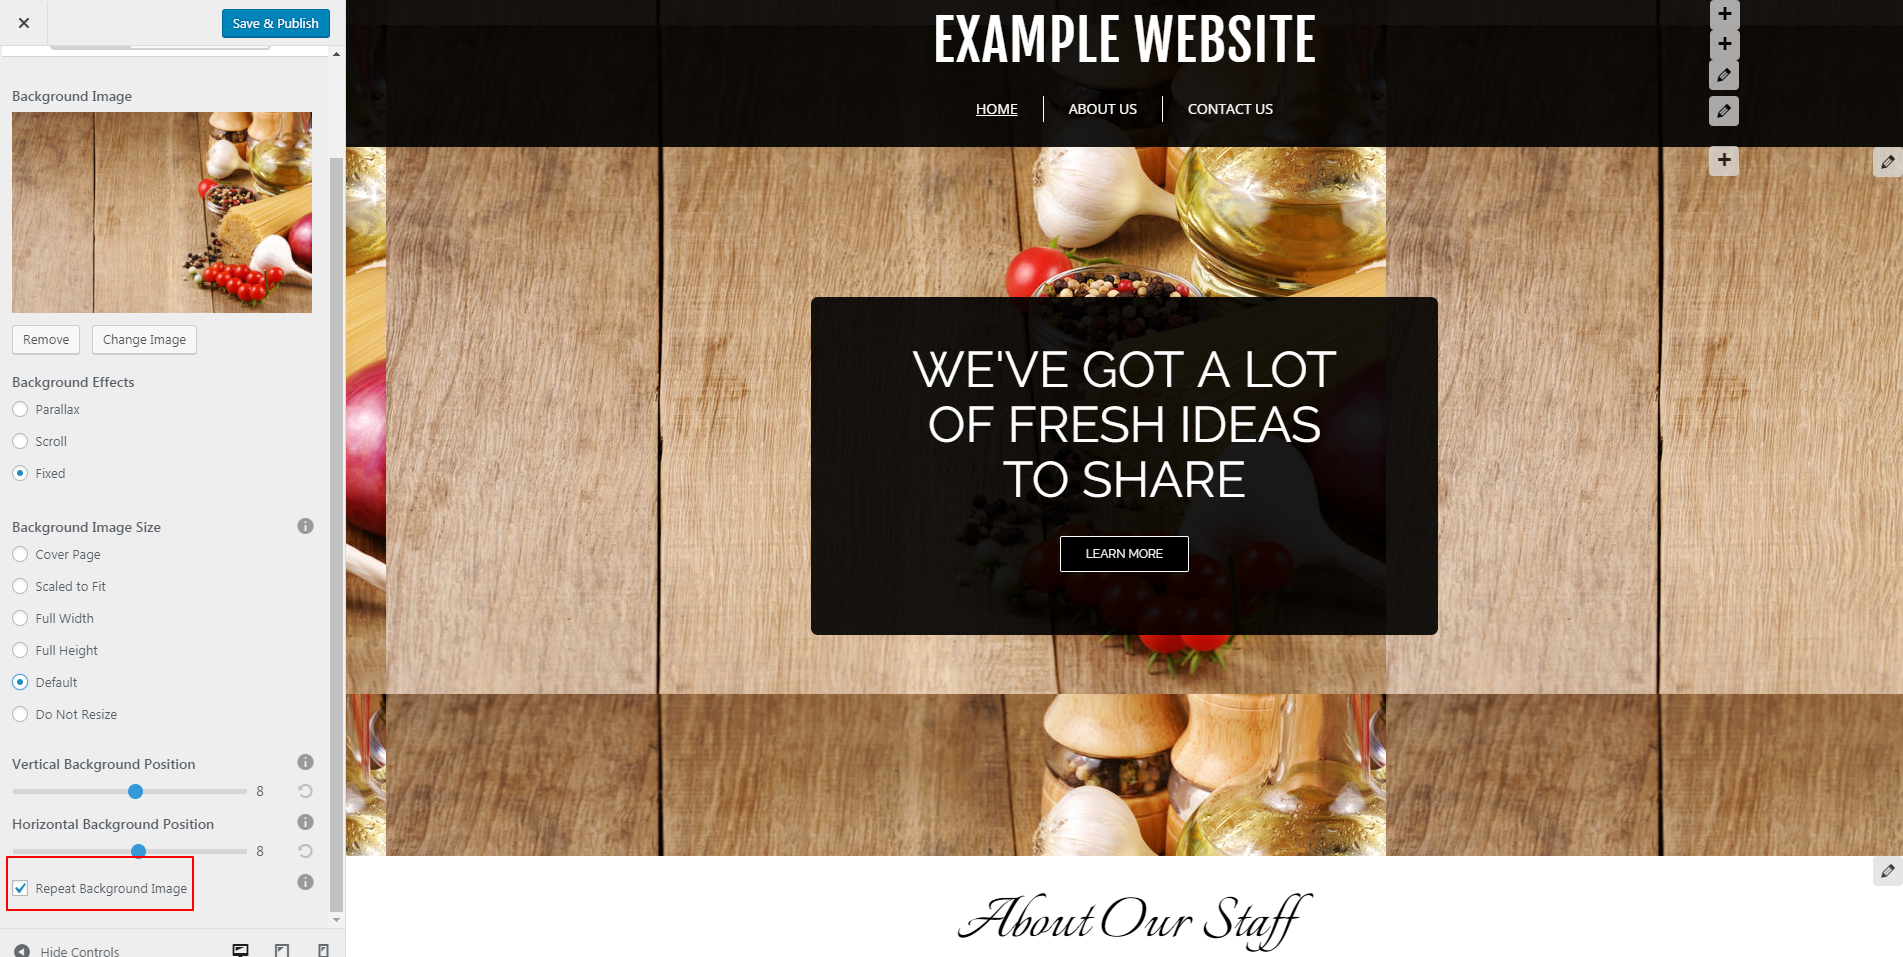
 “Default” does not resize the image at all, and will display the image at its actual size. “Repeat the Background” will duplicate the image behind the top layered image. Note below how the image repeats further in the background behind it.
 Always remember to hit “Save and Publish” at the top left corner whenever you are satisfied with your image choice, effect, size, and positioning.
Background Patterns and Colors
If you do not want to use an image, you can also simply use a pattern. BoldGrid offers dozens of patterns and colors in Customizer that you can use in lieu of (or in addition to) an image. Click on “Pattern and Color” from the left-hand sidebar to view the options you see in the following example.
 If you scroll down on the left-hand side of the Customizer, you will see a long list of “Background Pattern” choices. They will start in grayscale by default, but you are not limited to this coloring. Choose a pattern you like, then click “Select Color” below the text “Background Color” above the pattern choices. It will display the current color chosen.
 Change it to a color that you prefer for this web page, then change the transparency and/or saturation using the color picker. The left slider (closer to the color picker) allows for saturation changes, and the slider to the right controls transparency. Move these up and down to modify.
 Again, always remember to hit “Save and Publish” when satisfied with your selections.
Themes provide a great starting place for a website, but using the Customizer to make it your own makes an attractive website truly one-of-a-kind. Start customizing your site today with BoldGrid!
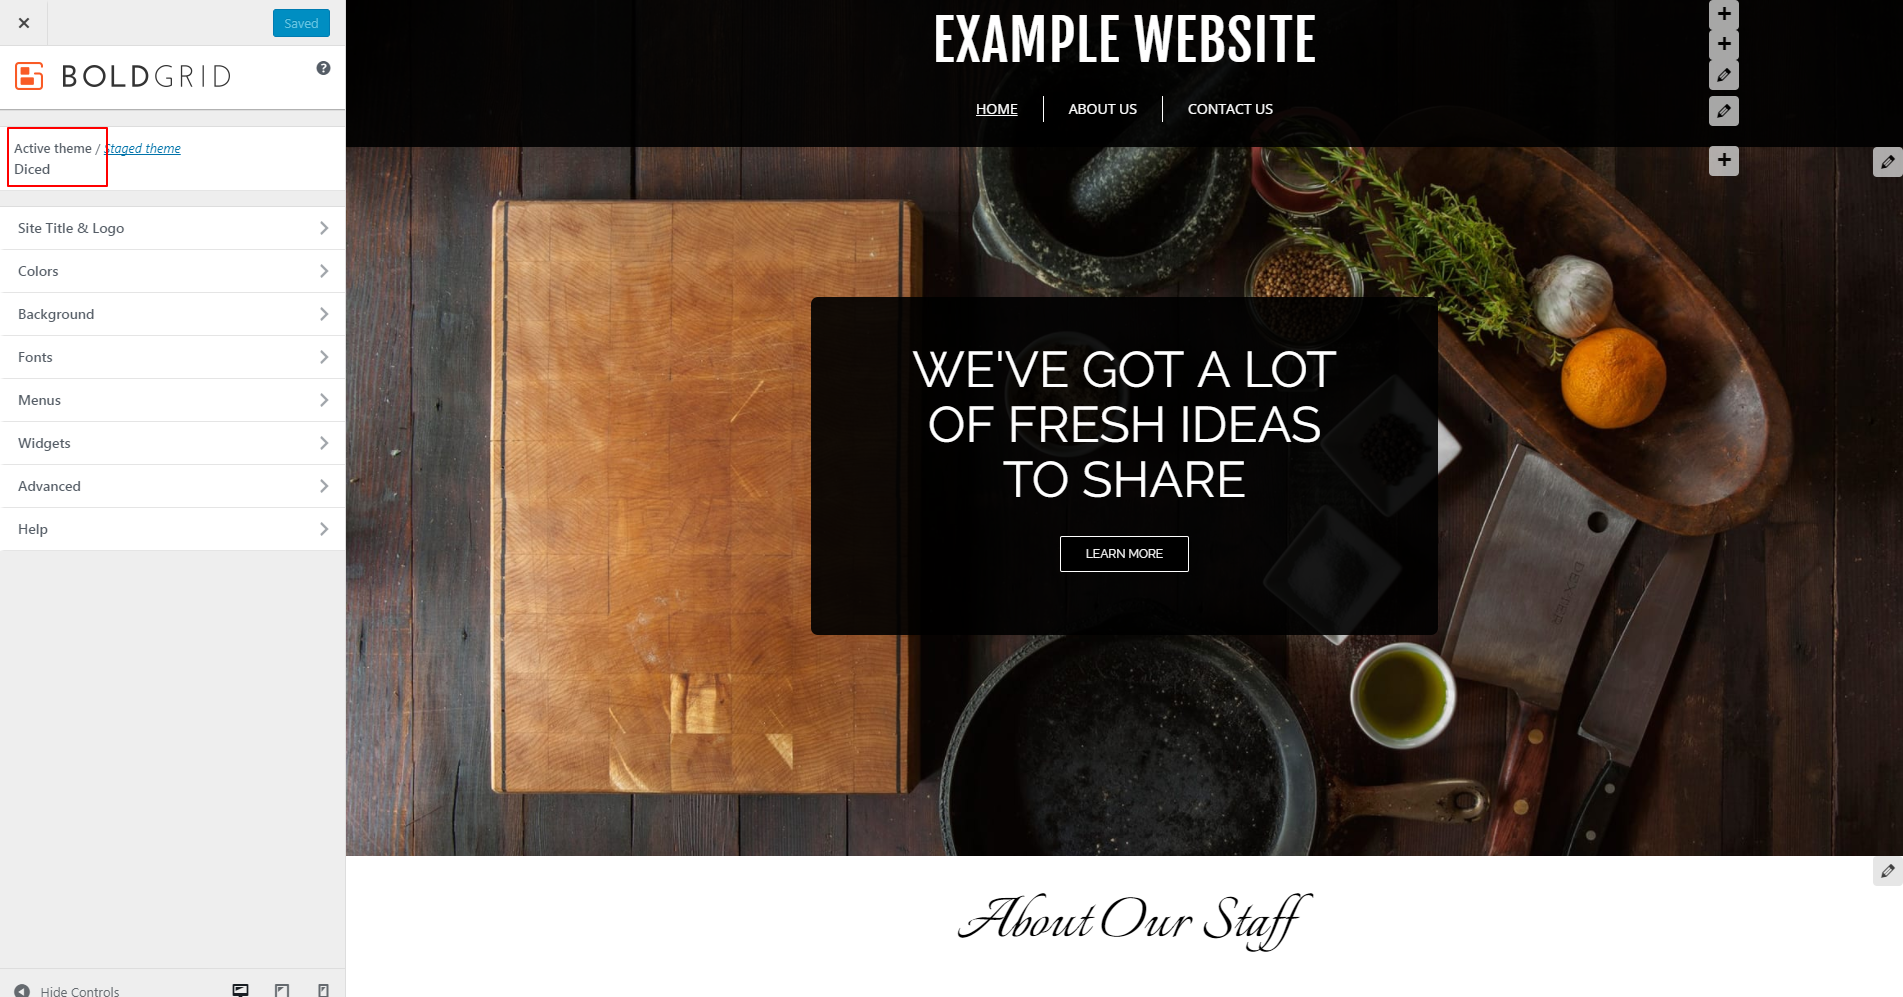
After logging into your WordPress admin menu, click on “Customize” on the left-hand sidebar menu. You will be brought to the Customizer page to begin making edits to the pre-built theme you chose. For this explanation, we will use “Diced” as our theme, but the same techniques will work for any of BoldGrid’s stylish Inspirations.
 Customizing Background Images
Some themes have an image that requires you to edit it on that specific page of your website using the Post and Page Builder (as opposed to the Customizer). For this example, we will use the Customizer.
Click on “Background” from the Customizer menu. You will see the current background image displayed in a thumbnail view. Below that, you can choose to remove or change the image. Click on “change image.”
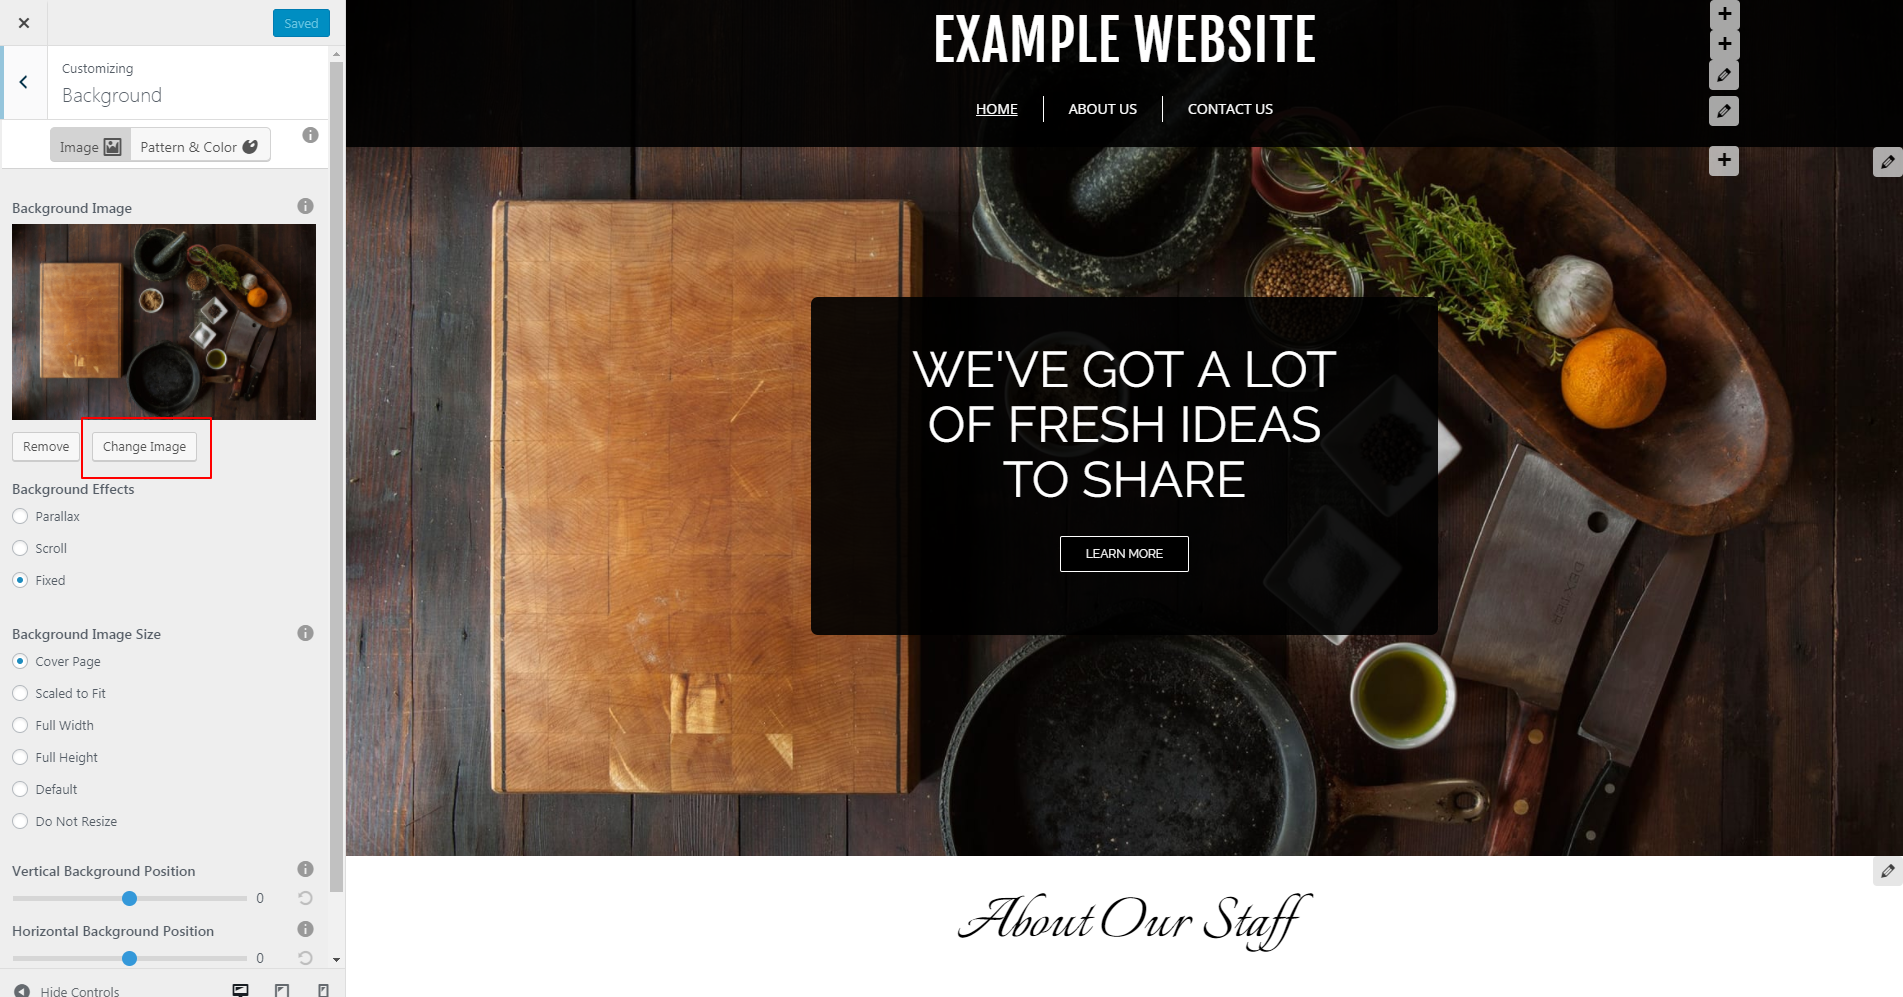 We suggest customizing your background image by uploading one of your own in order to distinguish it from other websites. But, you also have other options within your media library, allowing you to either choose an existing image or perform a BoldGrid Connect Search for a new one. BoldGrid Connect Search allows you to choose either images for purchase that come with a license, or free images to use at your discretion as the website owner. Type in the search bar on the top right to begin looking for relevant images to your website’s content.
We will upload our image to give it a more personalized look and feel. Click “upload files,” then either drag-and-drop the image or choose from your file folders. This should bring you to this page where you can determine attachment details like image size, title, description and more:
 After making your selection, BoldGrid will ask you to either crop the image or skip cropping altogether. Make your choice, then see the changes you made as you return to the Customizer page.
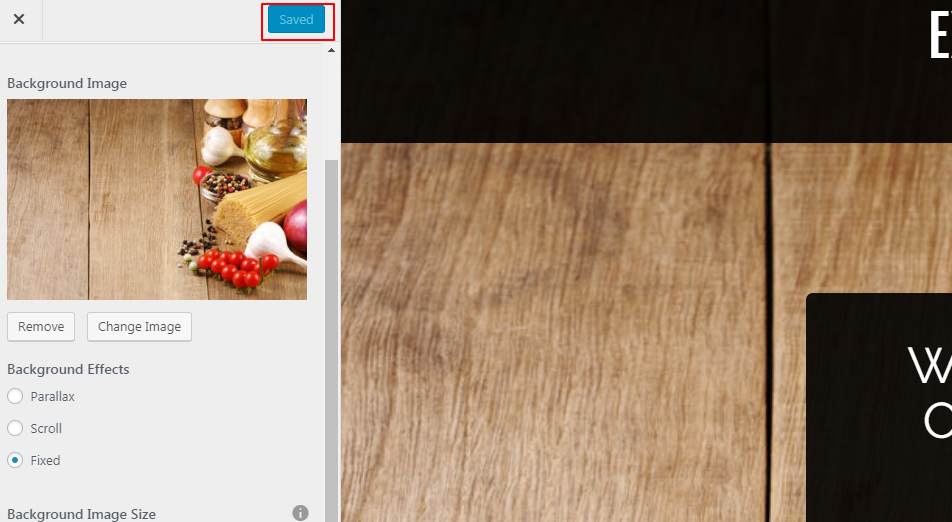
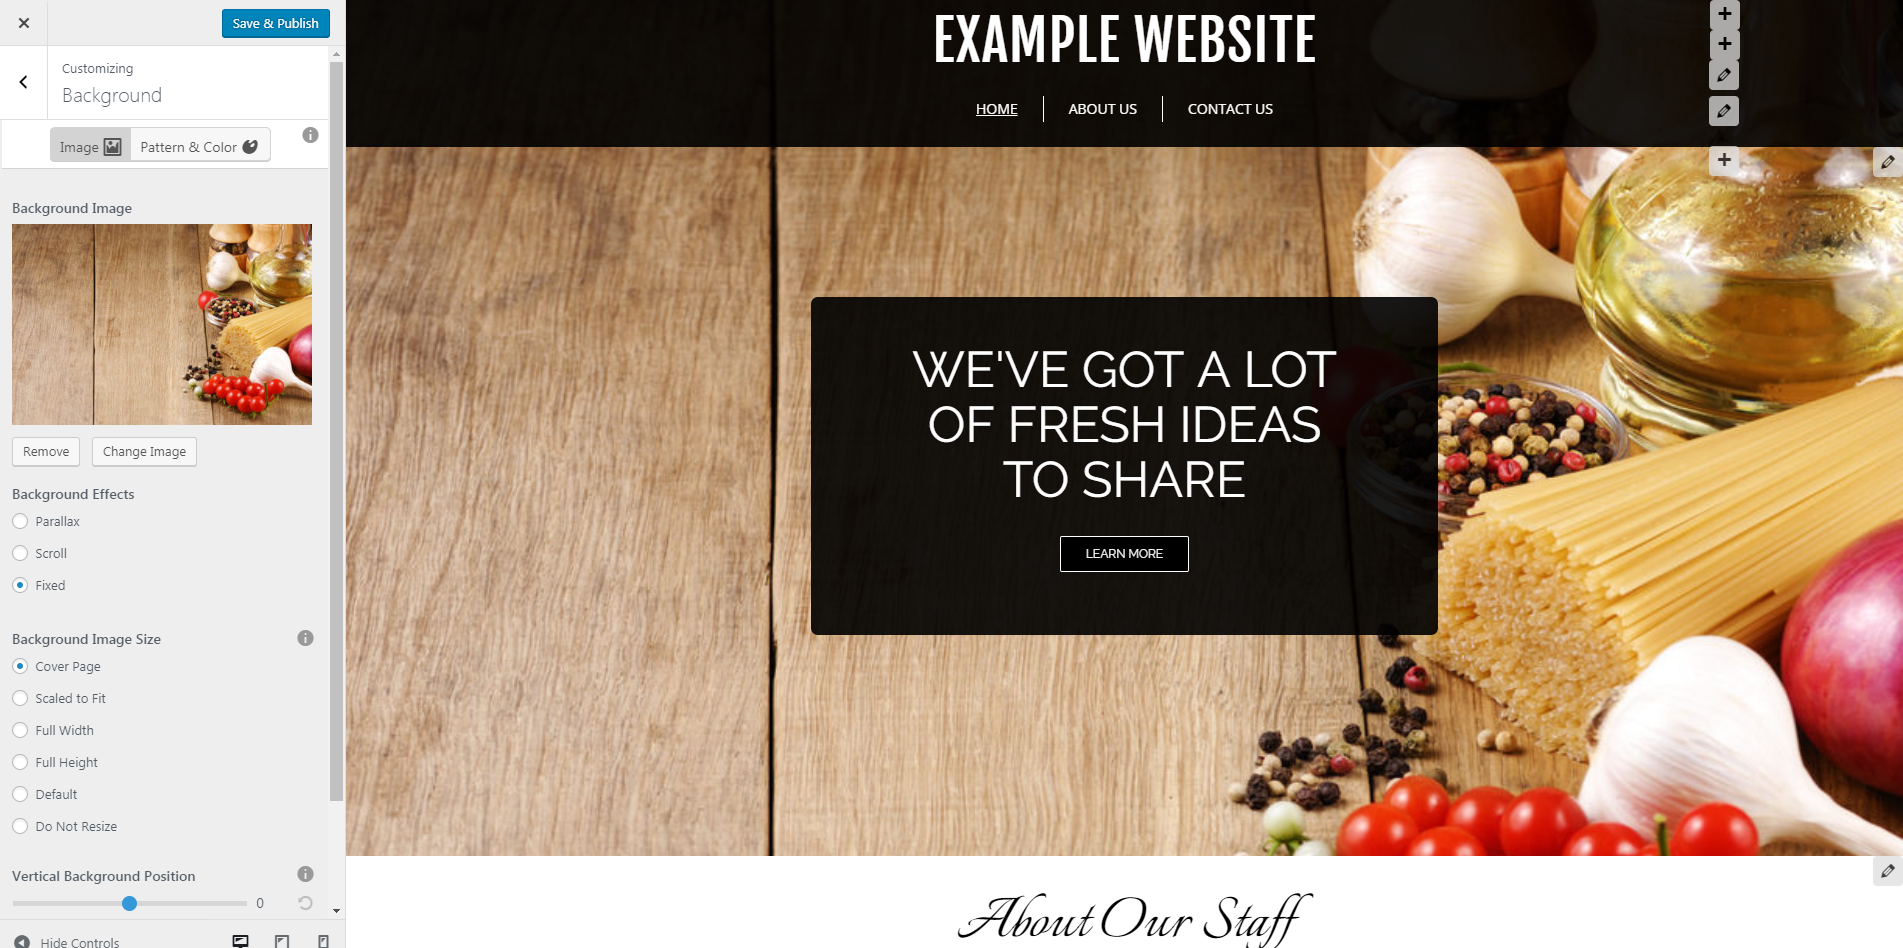 When you are satisfied with the image changes, click “Save and Publish” at the top of the left-hand sidebar. After you save your changes, the button will become grayed out with the word “Saved.”
 Background Image Effects
From the Customizer menu, we make it easy for you to choose a scrolling effect in a way that lets you see how it works with the image and interacts with the page. BoldGrid will select the option “Fixed” by default, which keeps the image in a fixed position as you scroll. Choosing “Parallax” for the background image allows it to move at a slightly different speed than the foreground content. Choosing “Scroll” will cause the image to scroll along with the rest of the page’s content. See this portion of our How to Customize Background in BoldGrid video for examples of these effects in action.
BackGround Image Sizes and Positions
On the left-hand sidebar, you also have the option to scale the image to a different size and position. Play around with it a bit to figure out what works best for the image you have chosen in the context of your page.
BoldGrid selects “Cover Page” by default for this theme, meaning it spans across the entirety of the web page. “Scaled to fit” will fit the image to your current view, but — depending on the size of the image relative to the page — it may leave a bit of white space (as it did to the right in the following screenshot).
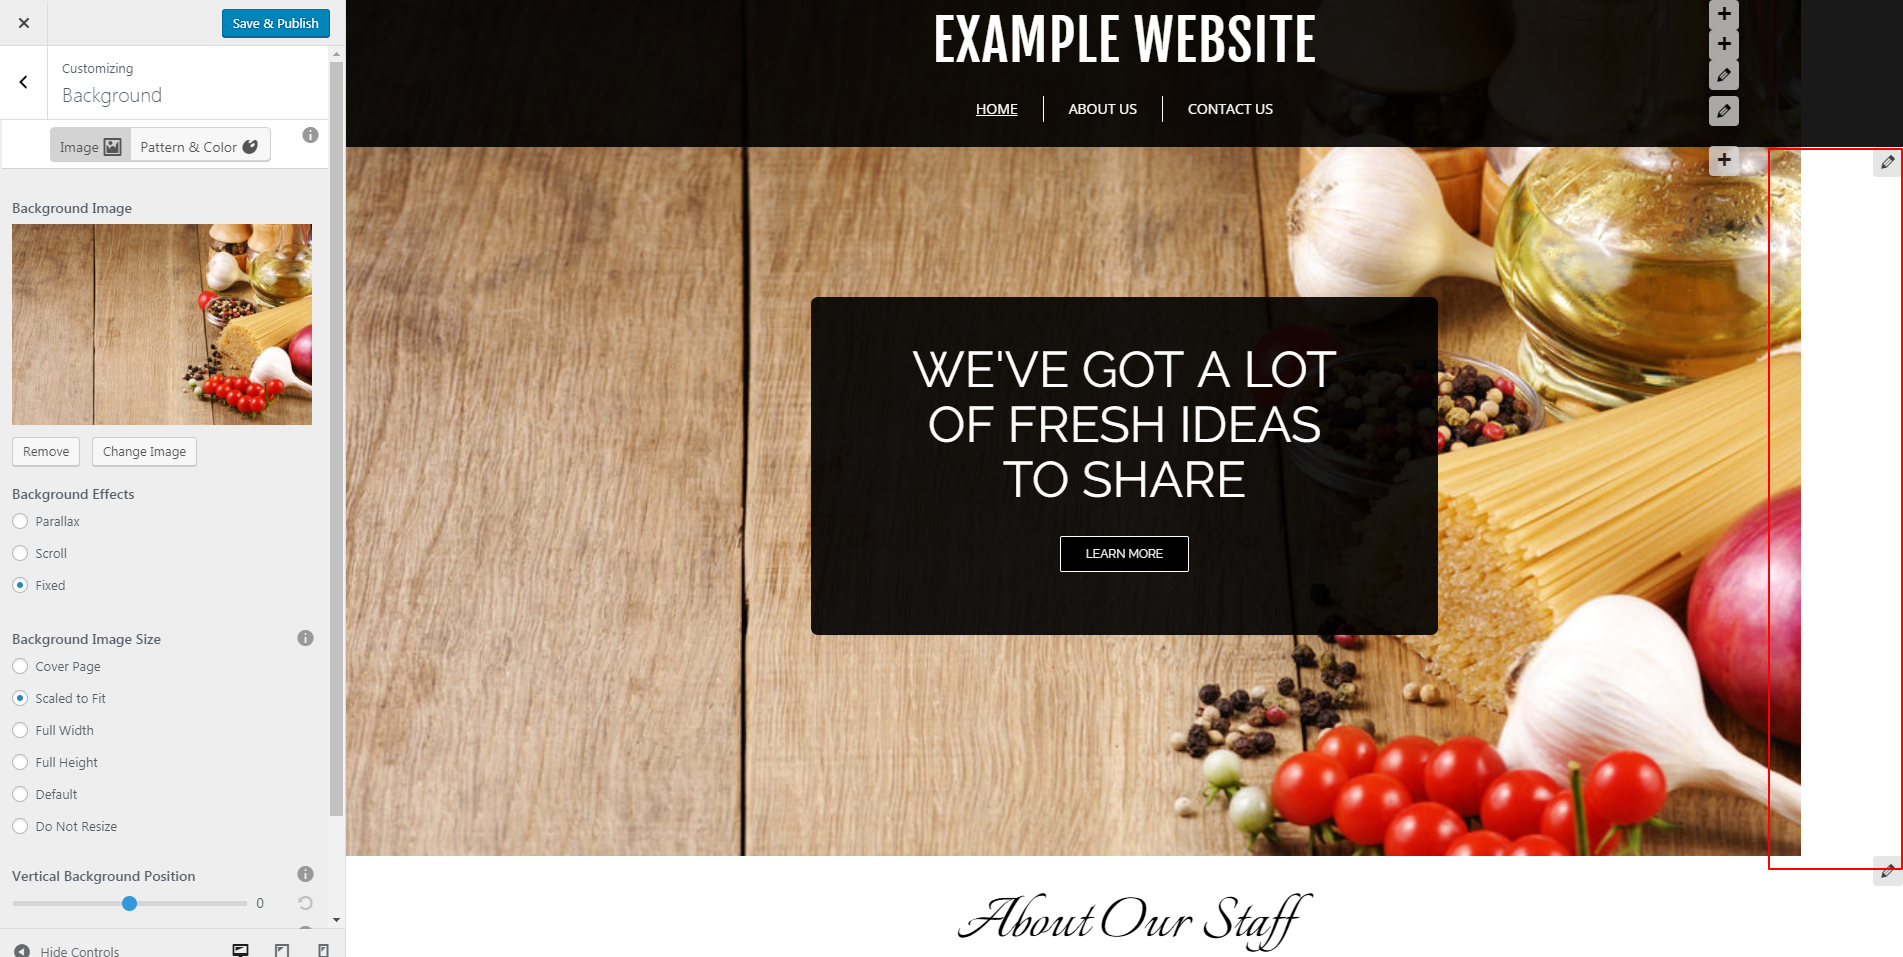 The “Full Width” option will fill the entire horizontal frame, while “Full Height” fills to the highest vertical point of the page. For this example, the same issue occurs as shown above where using that sizing effect creates white space on the white side. However, when you play around with the Vertical or Horizontal Background Position, you can manipulate the image a bit further by moving it up or down with Vertical Background Position, or right or left with Horizontal. The image displayed below shows how we created more equivalent whitespace around the image with those positioning options.
 “Default” does not resize the image at all, and will display the image at its actual size. “Repeat the Background” will duplicate the image behind the top layered image. Note below how the image repeats further in the background behind it.
 Always remember to hit “Save and Publish” at the top left corner whenever you are satisfied with your image choice, effect, size, and positioning.
Background Patterns and Colors
If you do not want to use an image, you can also simply use a pattern. BoldGrid offers dozens of patterns and colors in Customizer that you can use in lieu of (or in addition to) an image. Click on “Pattern and Color” from the left-hand sidebar to view the options you see in the following example.
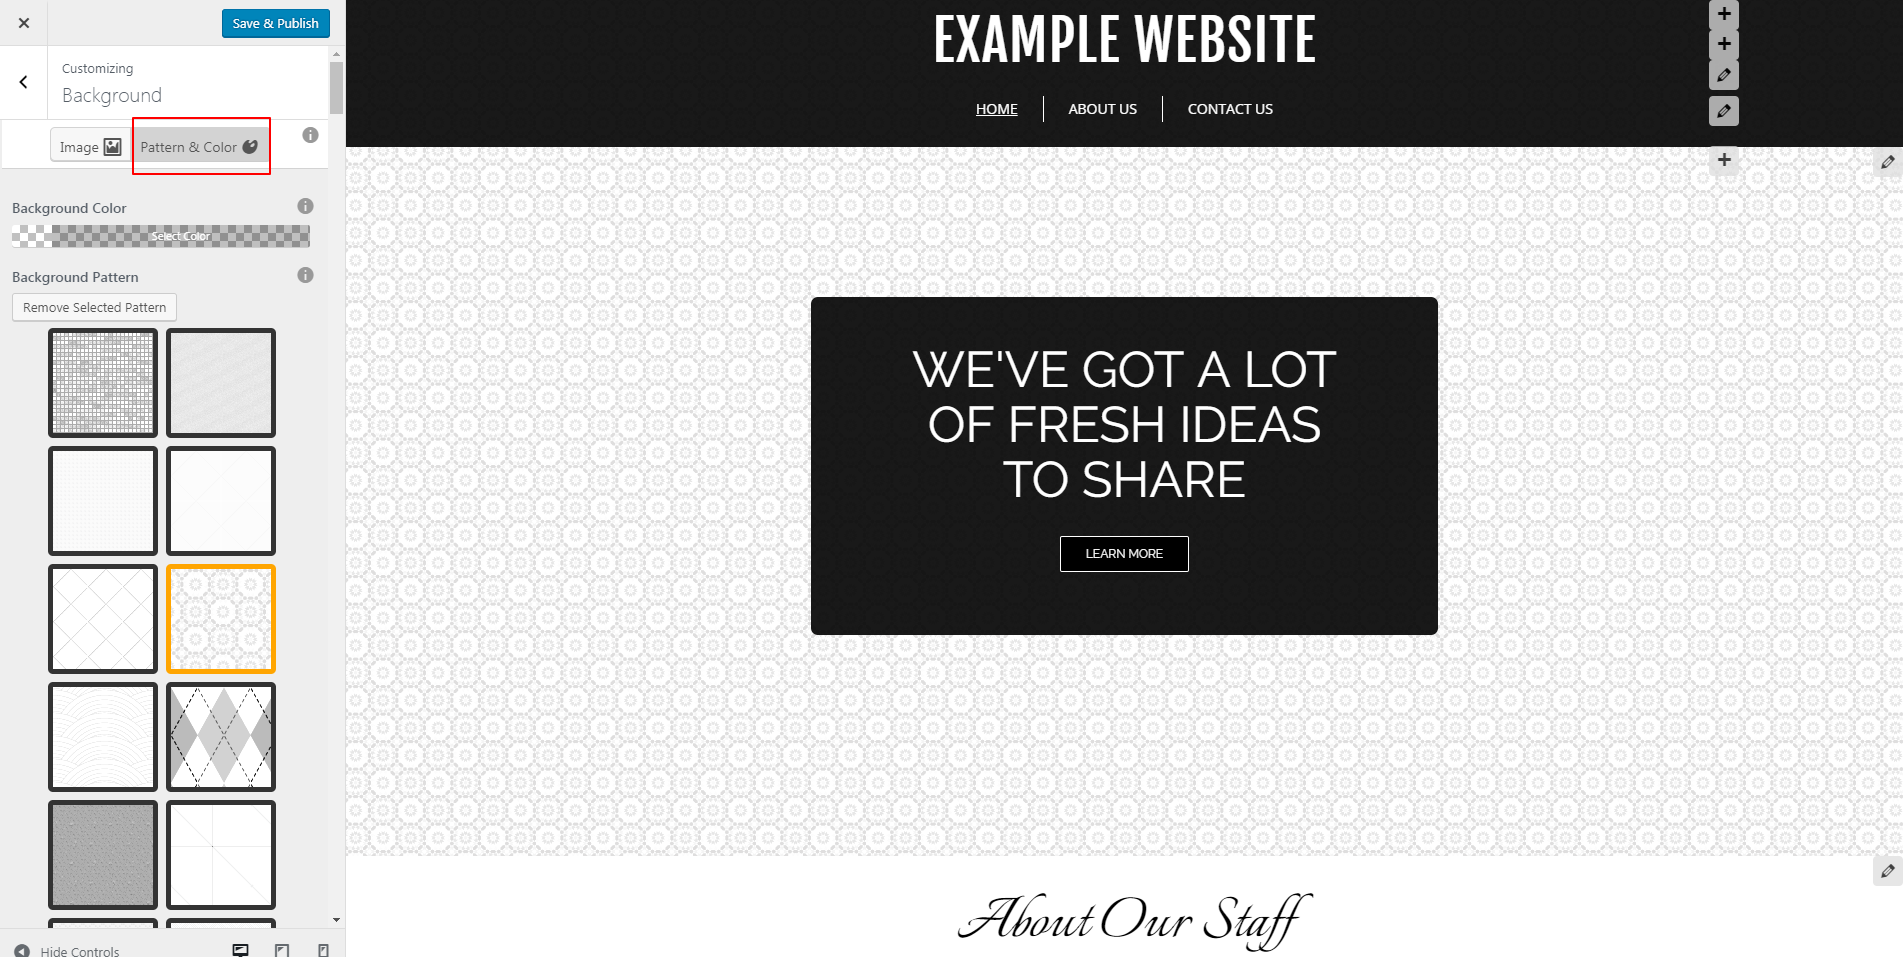 If you scroll down on the left-hand side of the Customizer, you will see a long list of “Background Pattern” choices. They will start in grayscale by default, but you are not limited to this coloring. Choose a pattern you like, then click “Select Color” below the text “Background Color” above the pattern choices. It will display the current color chosen.
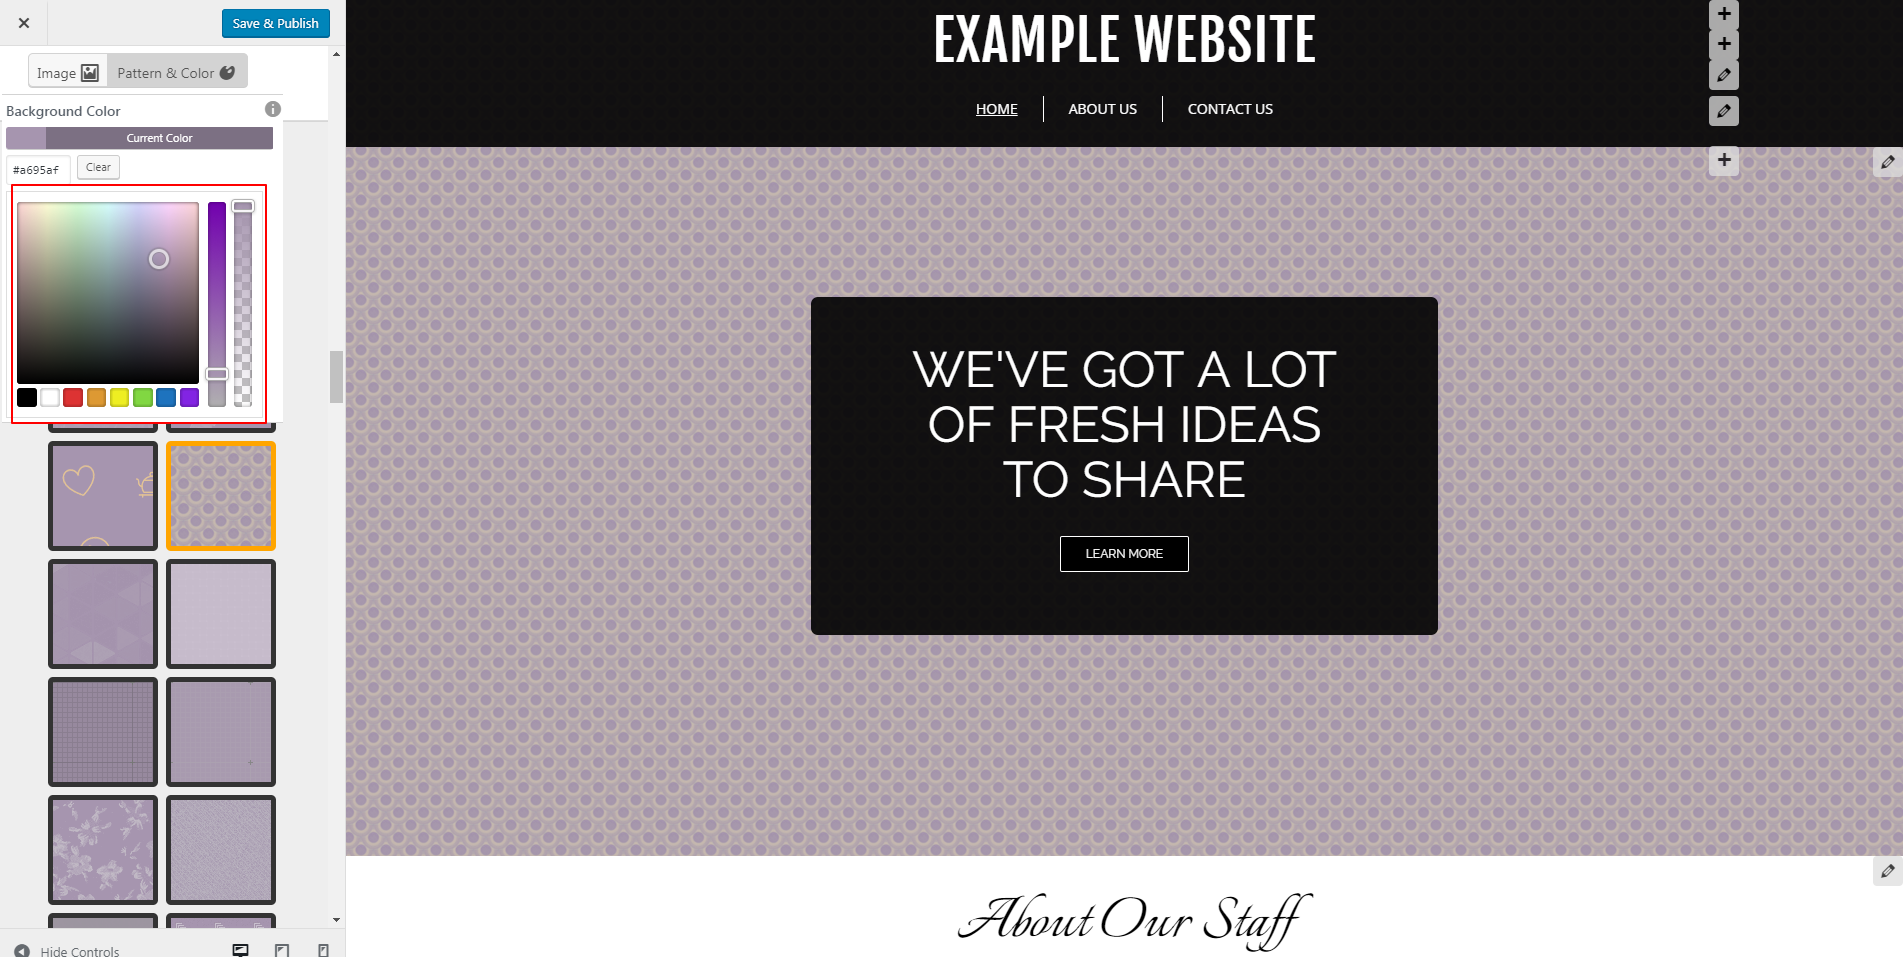
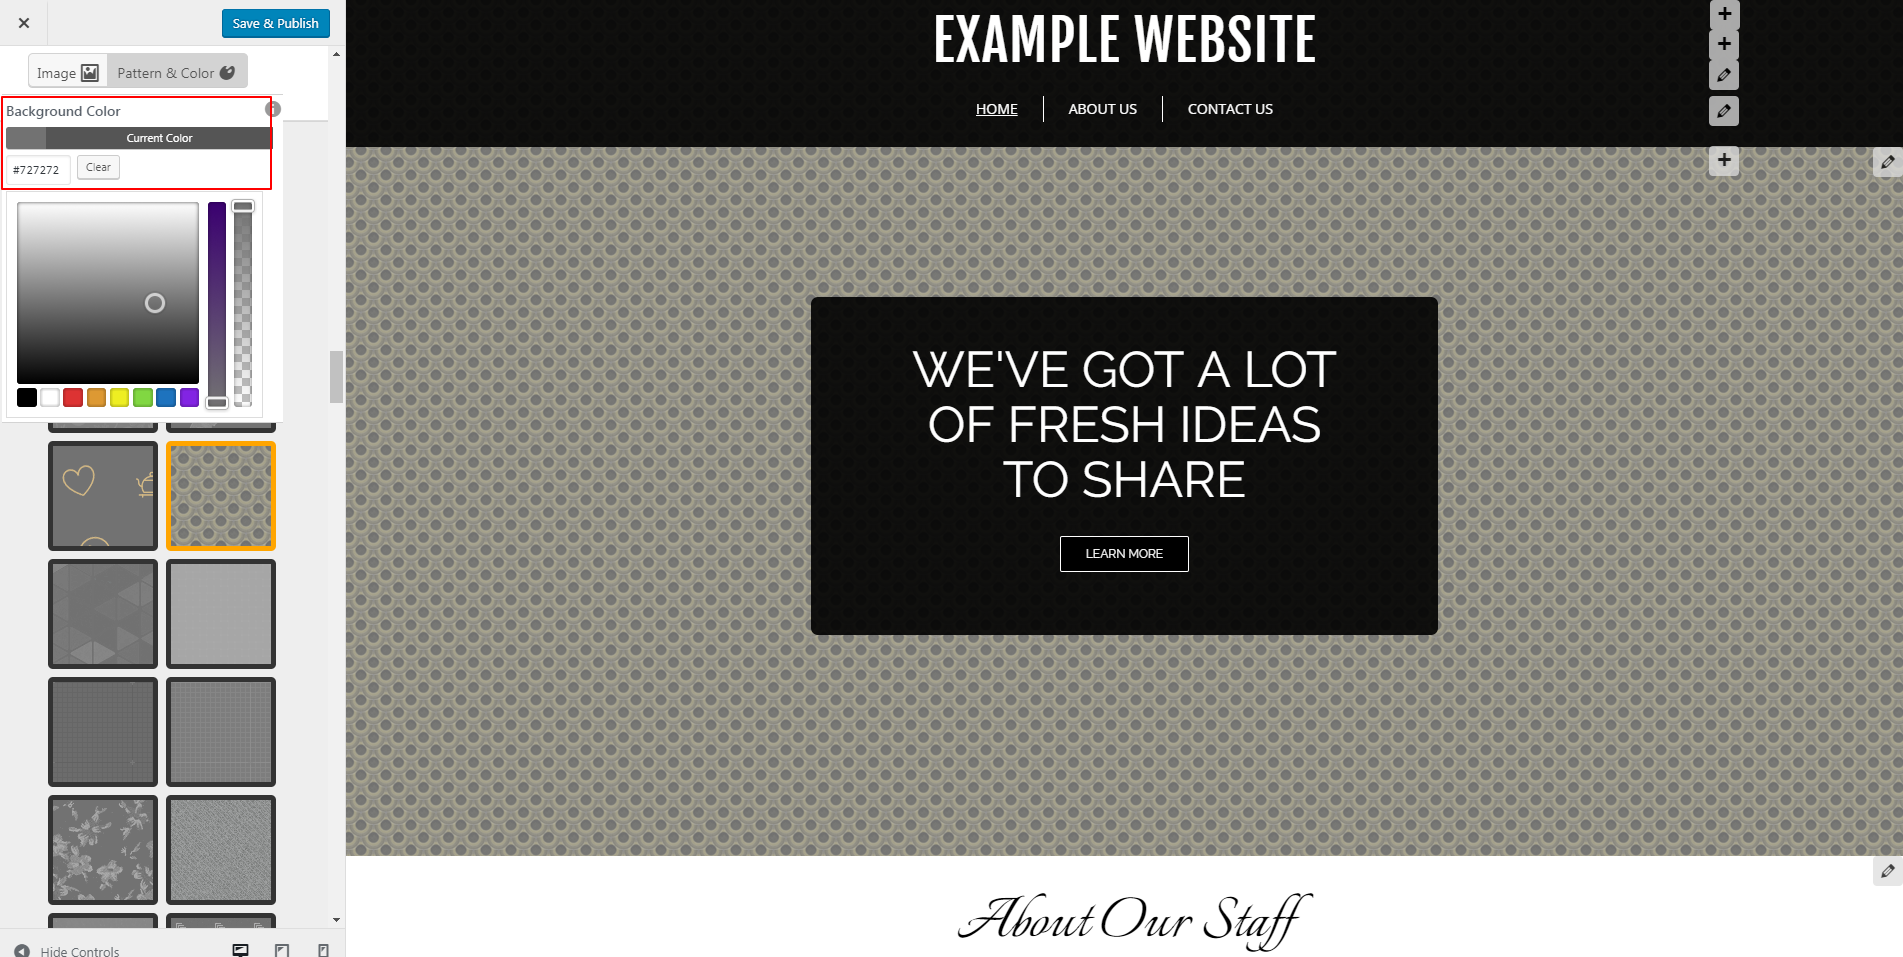 Change it to a color that you prefer for this web page, then change the transparency and/or saturation using the color picker. The left slider (closer to the color picker) allows for saturation changes, and the slider to the right controls transparency. Move these up and down to modify.
 Again, always remember to hit “Save and Publish” when satisfied with your selections.
Themes provide a great starting place for a website, but using the Customizer to make it your own makes an attractive website truly one-of-a-kind. Start customizing your site today with BoldGrid!