Customizing Website Widgets in BoldGrid
BoldGrid Tutorials
We define a widget simply as a small block that performs a specific function that you can place on your website or blog. Examples of widgets include: email signups, slideshows, voting polls, weather reports, and booking calendars. Dependent on your business, widgets can help improve customer experience and allow you to collect information about your website visitors. Sometimes you may find adding widgets to your site a bit difficult. But, customizing website widgets in BoldGrid can be done quickly and easily through our Customizer.
Login to your WordPress admin menu, and select “Customize” from the dashboard.
Then select “Widgets” from the left-hand side menu to view the following page.
 Each theme provides a different amount of widget areas dependent on the style. BoldGrid will tell you how many your particular theme has. Our current theme has a few options on this page, as well as 9 other widget areas (not currently displayed). Highlighted in the red box, you can see we have three widget options on the homepage: “Call to Action,” “Below Primary Navigation,” and “Footer Center.”
If you hover over any of those three options, our Customizer will show you exactly where those widgets would appear. Please see the three images below for examples.
Call to Action:
 Below Primary Navigation:
 Footer Center:

 To save any changes made within the existing call to action, just click “close” in the bottom left corner. If you want to remove this widget altogether, click “remove” instead.
To add a brand new call to action widget, click on the button labeled “+ Add a Widget.” You will see another submenu pop out that gives you the opportunity to search for a specific widget or scroll through the various options.
F
 For this example, we will choose to add a search bar. When you select this widget it appears on the page below the existing call to action widget. On the left side, you can edit the title of the search bar which will display on the page.
 If you would like to change the order of the “call to action” widgets, click on “reorder,” drag-and-drop to sort them into the order you prefer, then click “done.” We moved the search bar to the top of the page; a widely accepted design practice for this type of widget.
When satisfied with the call to action widgets, select “Save & Publish” at the top of the Customizer menu. Then click the left-point carrot to go back to the widget menu.
 Click on “Header Widgets” and decide whether or not you would like to add more widgets to the header of your page. You can add up to four widgets in the header. To add a custom header widget, paste the custom HTML into the white box below “Custom Header HTML.”
 Go back to the main widgets menu in Customizer, then select “Footer Widgets.” You have the option to disable the footer by toggling “on” to “off,” which will remove all the options below the “Enable Footer” button.
 If you kept the footer widgets enabled, you will see “Attribution Control” options to hide the acknowledgment of this site as built with BoldGrid and powered by WordPress. Lastly, you can add up to four more footer widget columns at the bottom of your page by clicking the circle next to the corresponding number.
As always, click “Save & Publish” at the top of the Customizer menu to update your site.
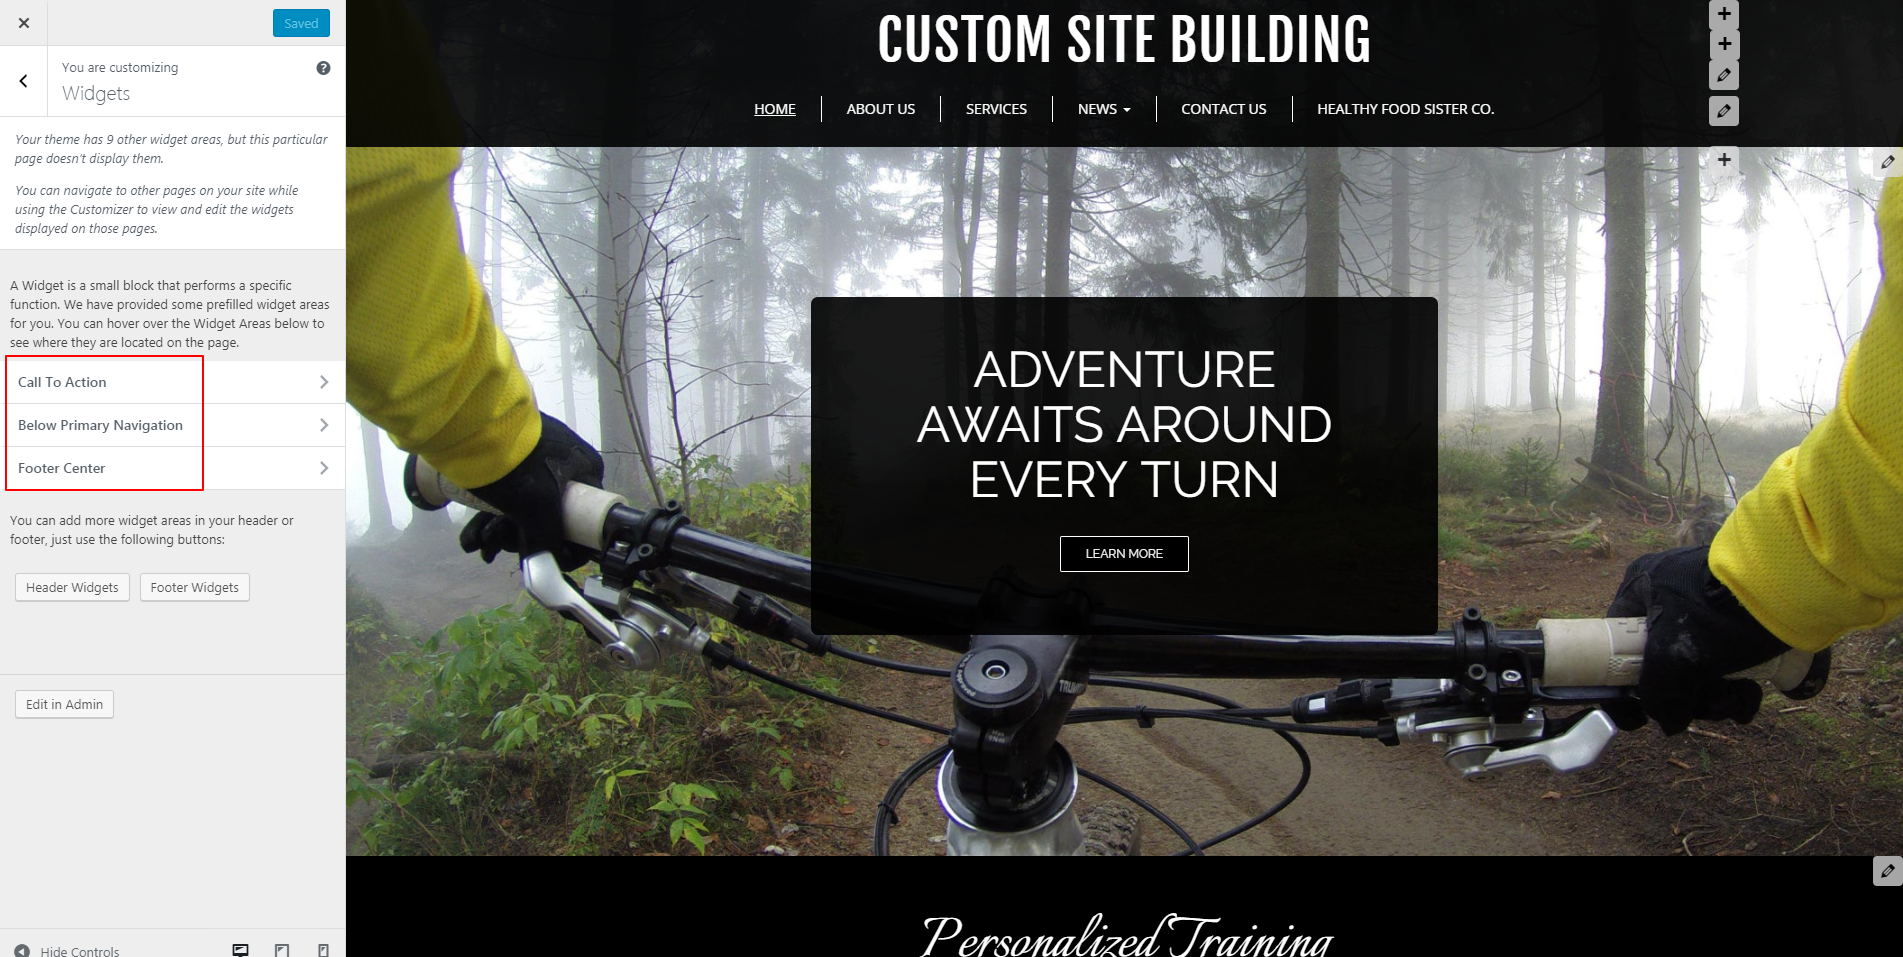 Each theme provides a different amount of widget areas dependent on the style. BoldGrid will tell you how many your particular theme has. Our current theme has a few options on this page, as well as 9 other widget areas (not currently displayed). Highlighted in the red box, you can see we have three widget options on the homepage: “Call to Action,” “Below Primary Navigation,” and “Footer Center.”
If you hover over any of those three options, our Customizer will show you exactly where those widgets would appear. Please see the three images below for examples.
Call to Action:
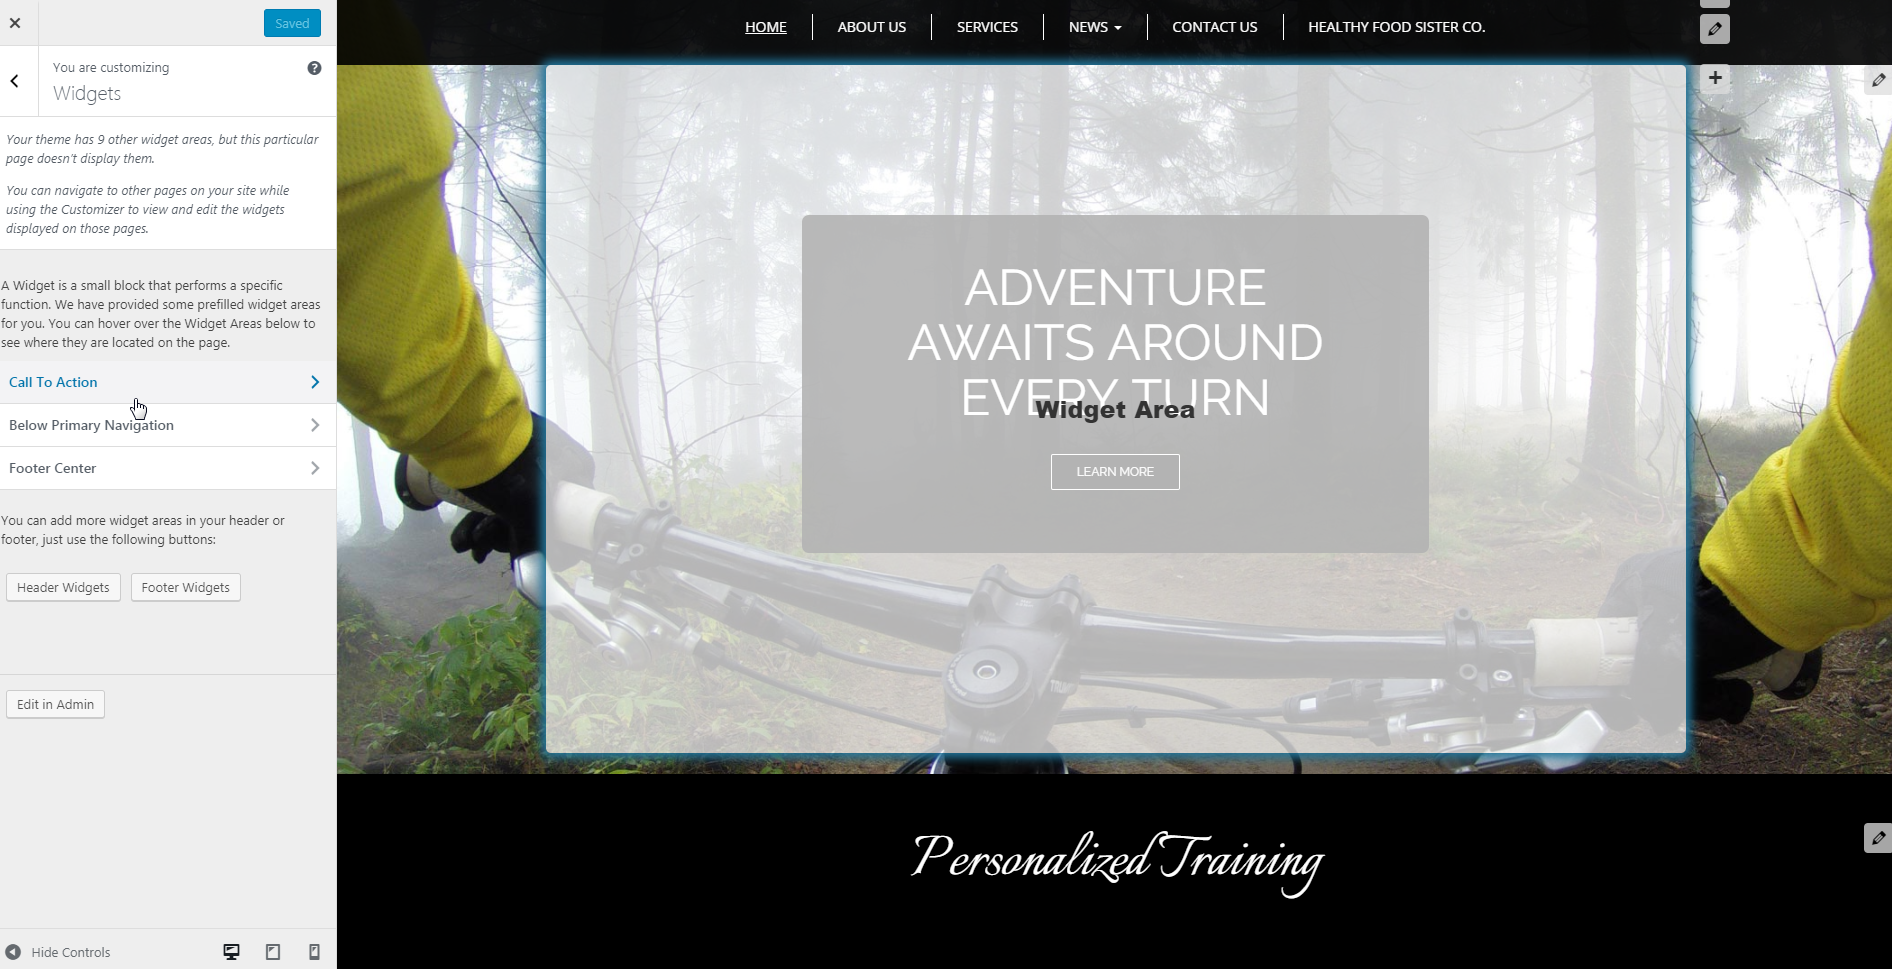 Below Primary Navigation:
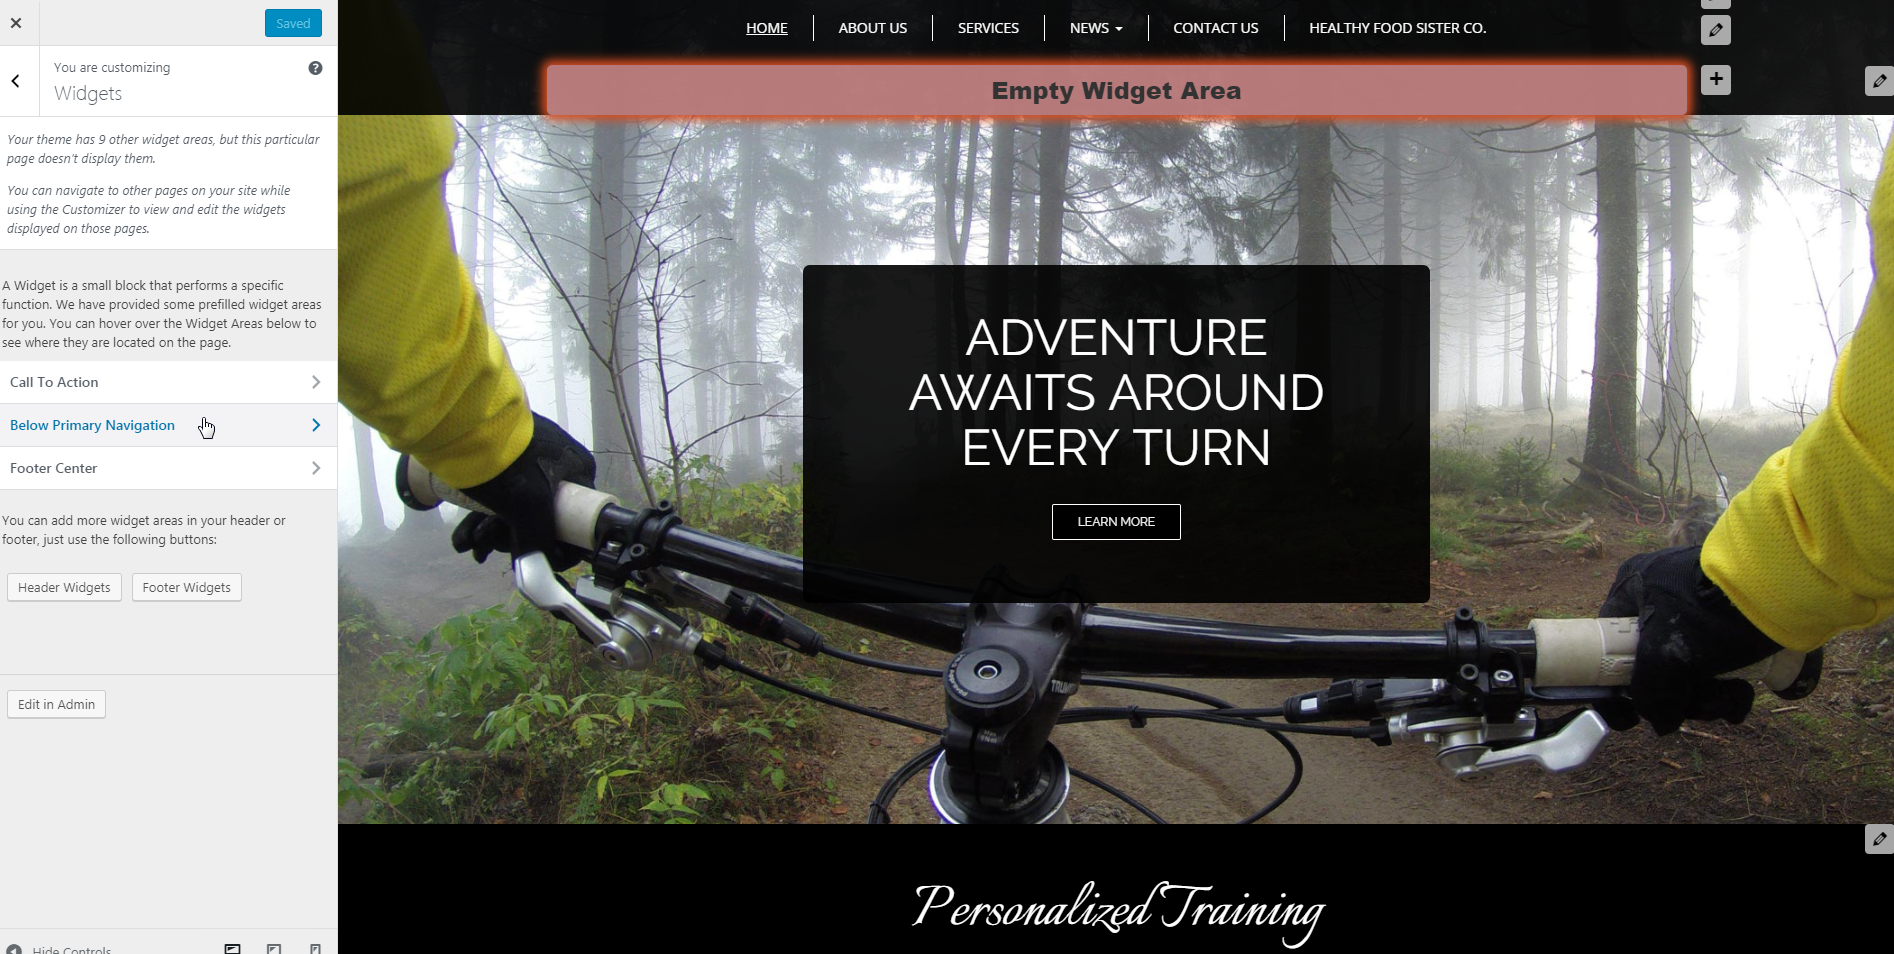 Footer Center:
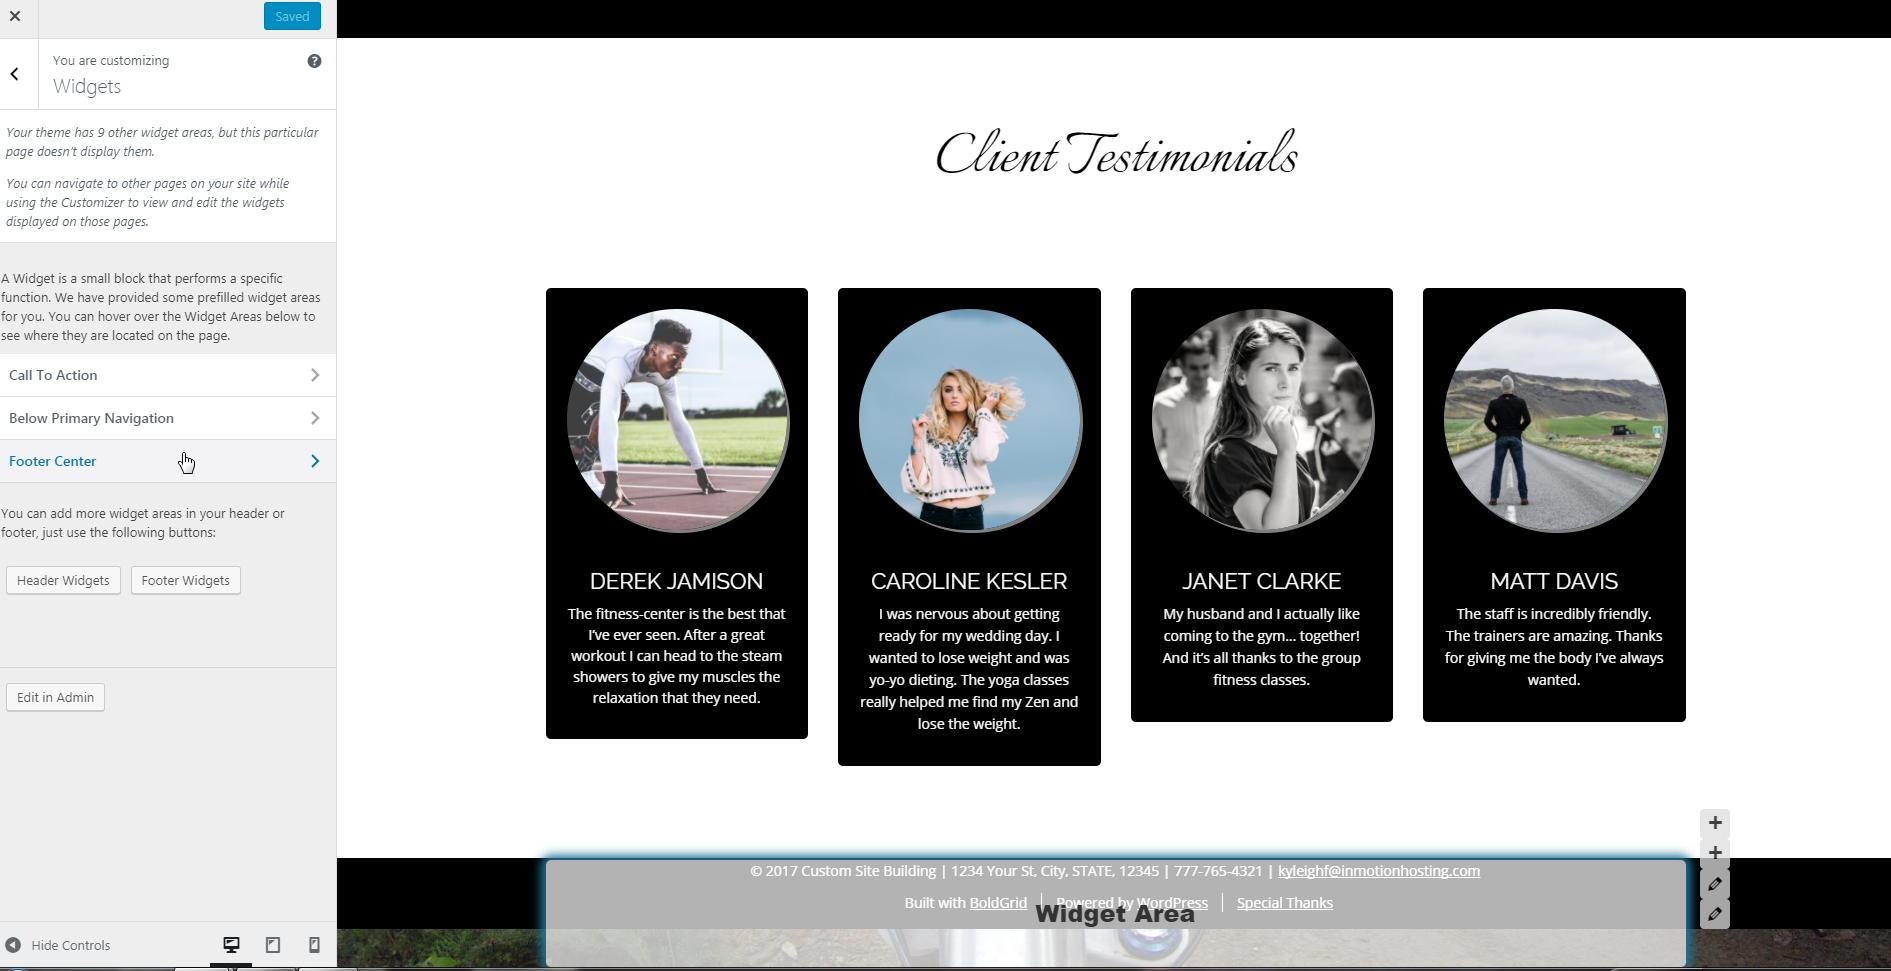
Customize Call to Action Widget
Currently, our theme already has a call to action widget. The large black box at the top center portion of our homepage that states “Adventure awaits around every turn” with a button labeled “Learn More” button is a call to action. It brings one to the About Us page where your site visitor can learn more about the company and also click a button to contact them. If you would like to edit this section, click “Call to Action” and then “Visual Editor: Call to Action” from the submenu in Customizer. As you can see below, you have a similar toolbar as you would for a post. Here you can add a title for SEO purposes, media, a form, or you can edit the existing content by simply clicking on the text to edit.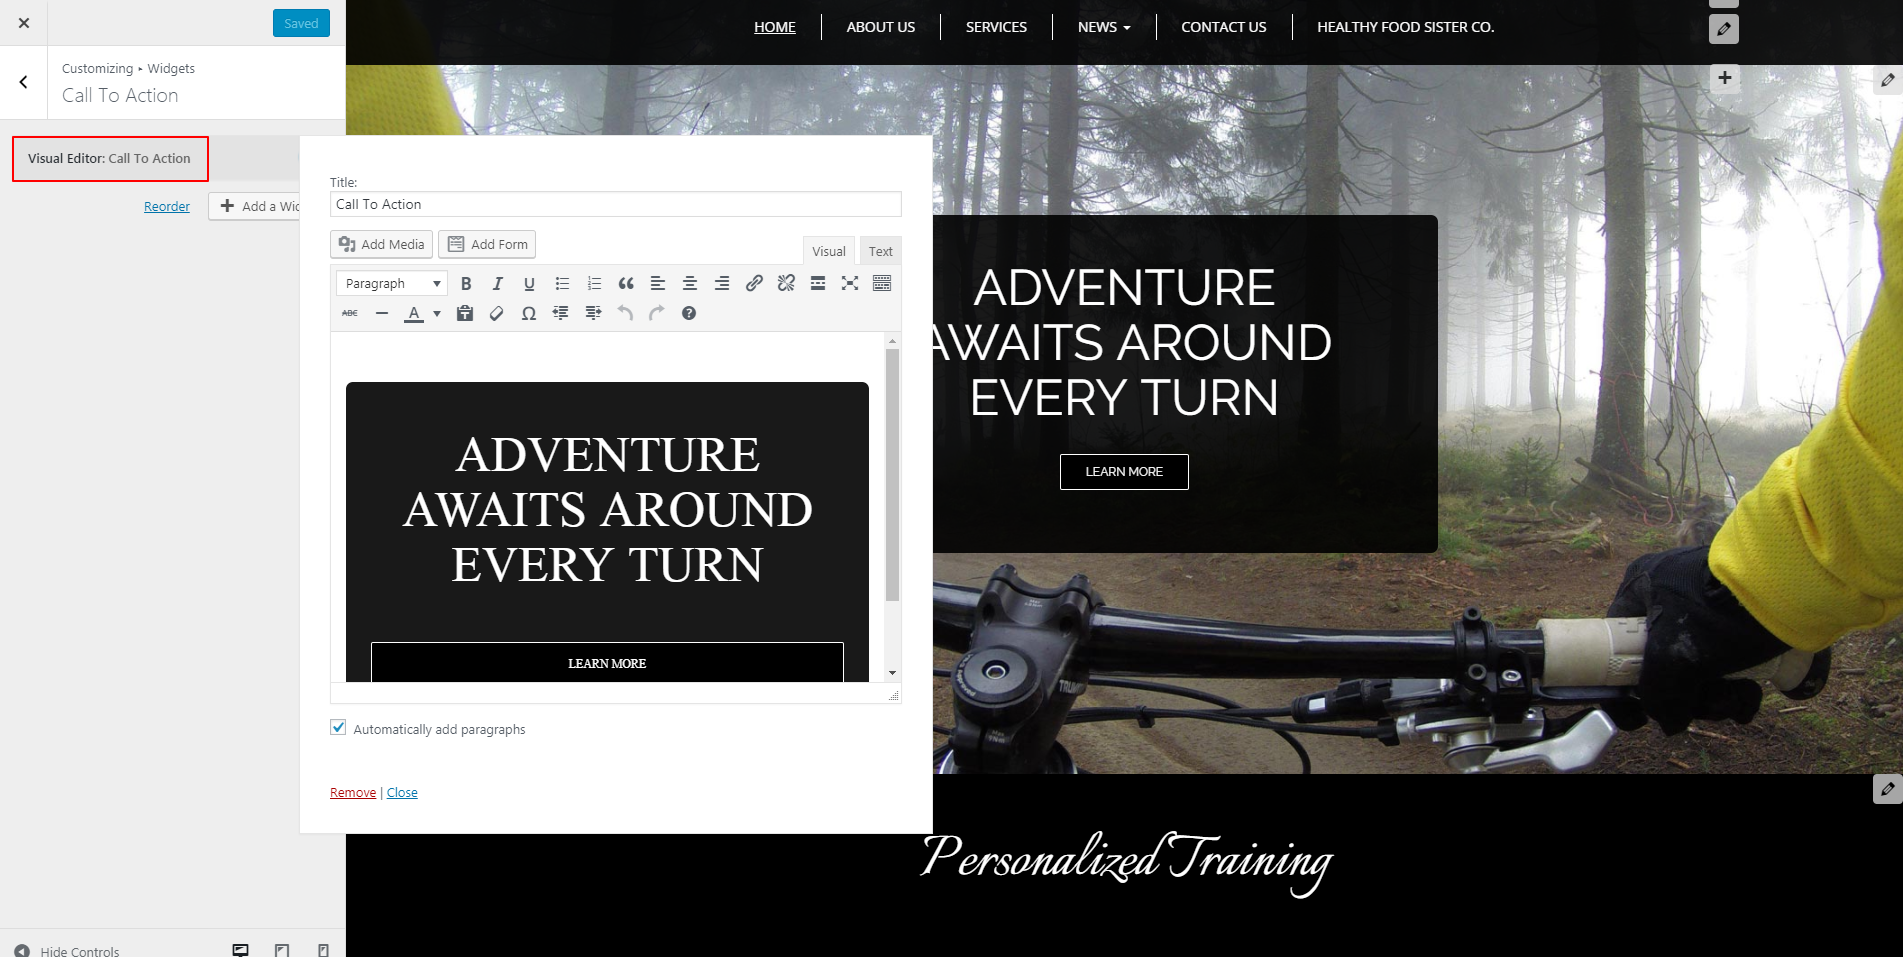 To save any changes made within the existing call to action, just click “close” in the bottom left corner. If you want to remove this widget altogether, click “remove” instead.
To add a brand new call to action widget, click on the button labeled “+ Add a Widget.” You will see another submenu pop out that gives you the opportunity to search for a specific widget or scroll through the various options.
F
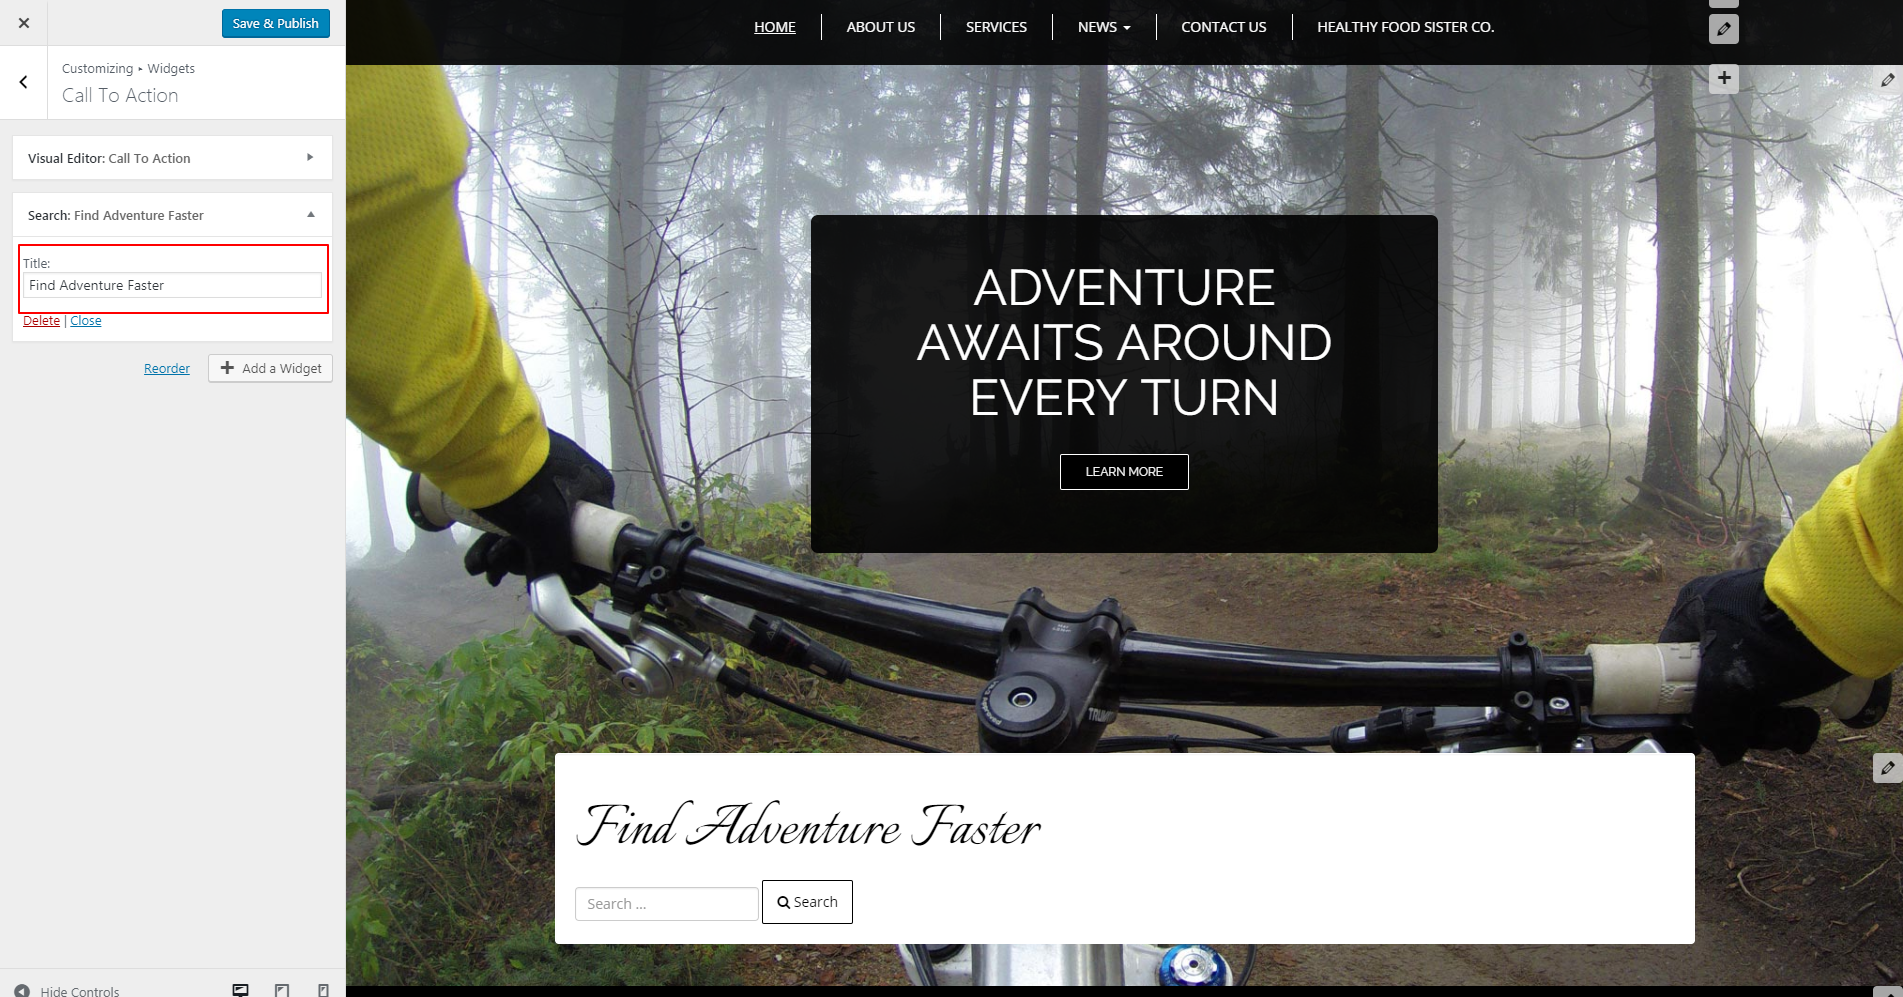
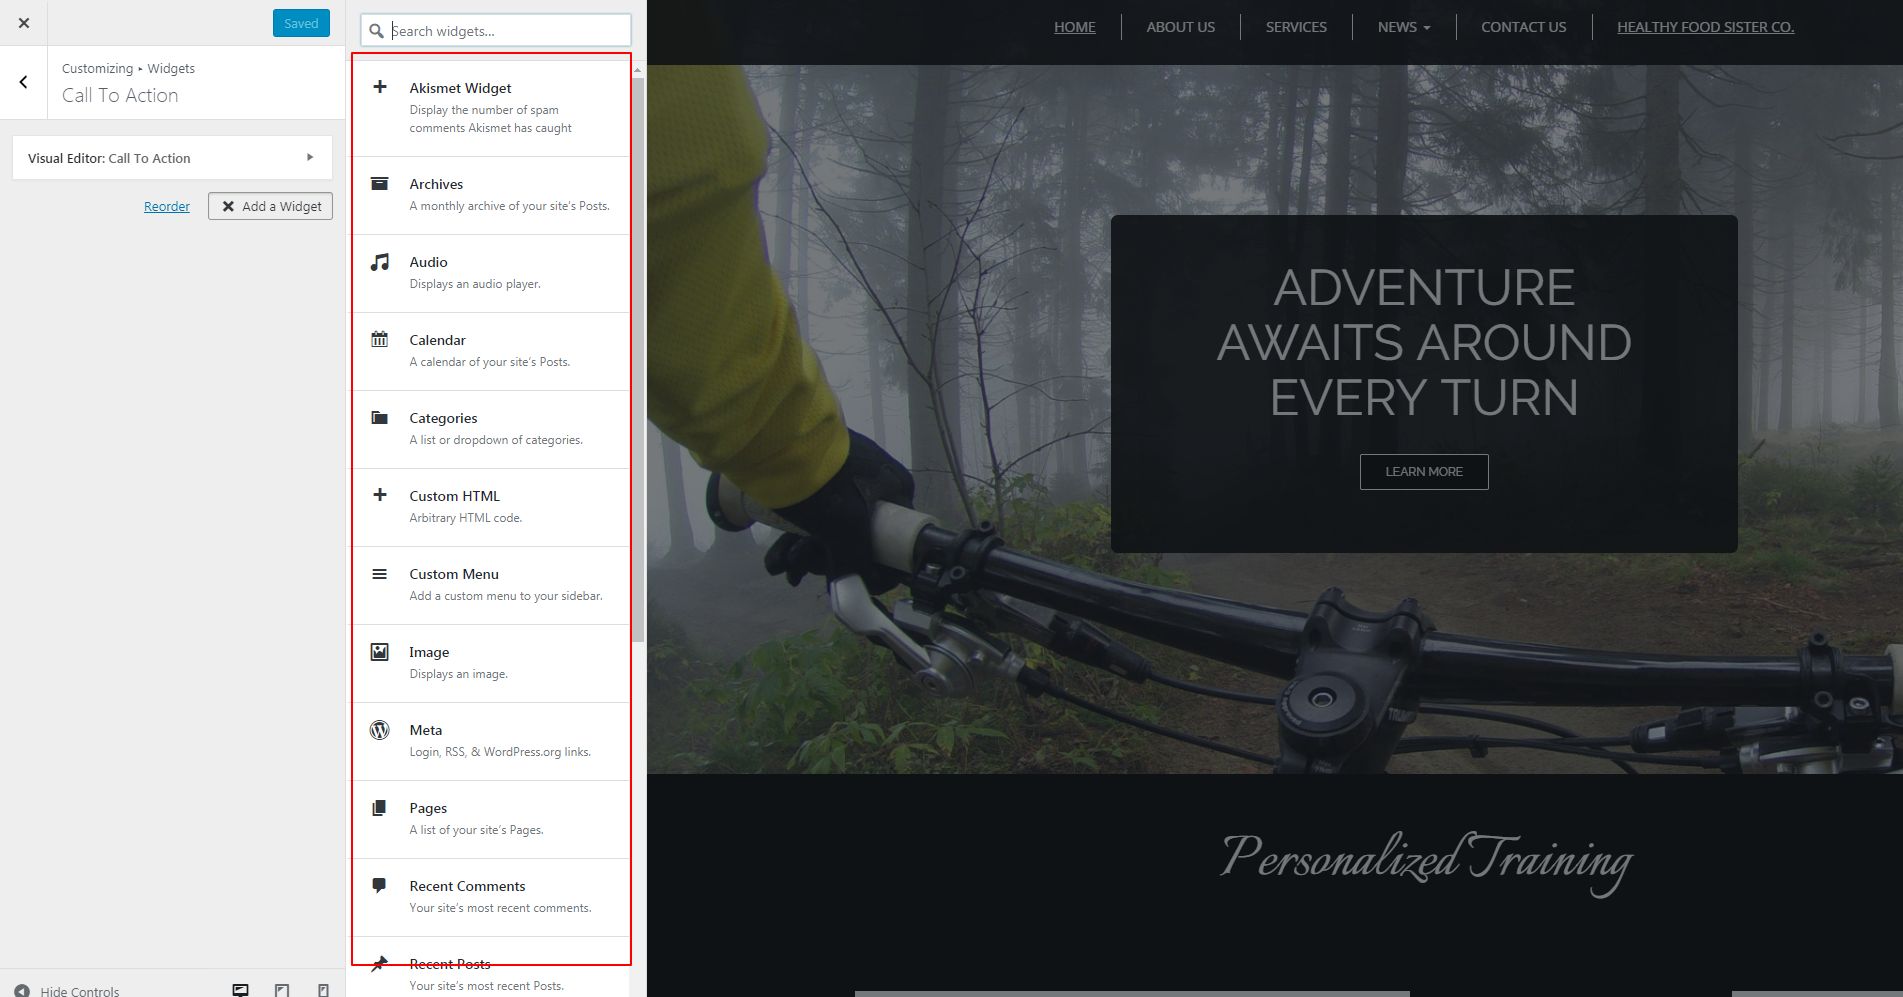 For this example, we will choose to add a search bar. When you select this widget it appears on the page below the existing call to action widget. On the left side, you can edit the title of the search bar which will display on the page.
 If you would like to change the order of the “call to action” widgets, click on “reorder,” drag-and-drop to sort them into the order you prefer, then click “done.” We moved the search bar to the top of the page; a widely accepted design practice for this type of widget.
When satisfied with the call to action widgets, select “Save & Publish” at the top of the Customizer menu. Then click the left-point carrot to go back to the widget menu.
Customizing Below Primary Navigation Widget
To add a widget below the main navigation at the top of your page, click on “Below Primary Navigation.” In the example below, we do not currently have an existing widget in this area. If you click on “+ Add a Widget” you will see the same options you had when adding the call to action. For this example, we will add a “recent posts” widget. Again, you can edit the title on the left. This widget has a couple more customization options, including setting the number of posts to show and whether to display the post date. When pleased with the widget, select “close,” then “Save & Publish” to add it to your site. Next, click the left-facing carrot to go back to the main widgets menu.Customizing a Footer Center Widget
Select “Footer Center” to edit or add a widget to the bottom of your website. In the example below, we currently do not have an existing widget in the footer with our contact information. Click on “Visual Editor: Contact Info” to update the contact information, or edit this widget to your liking. You can also delete this widget by clicking “remove” from the bottom left of the “Visual Editor” widget. Otherwise, click “Close” to save any changes made. You also have the same options to add additional widgets to the Footer Center area of this page and reorder them as you did in the other two widget areas.Adding Header and Footer Widgets to Your Page
If you return to the main widgets menu, you will see that buttons for “Header Widgets” and “Footer Widgets” below the three main widget areas.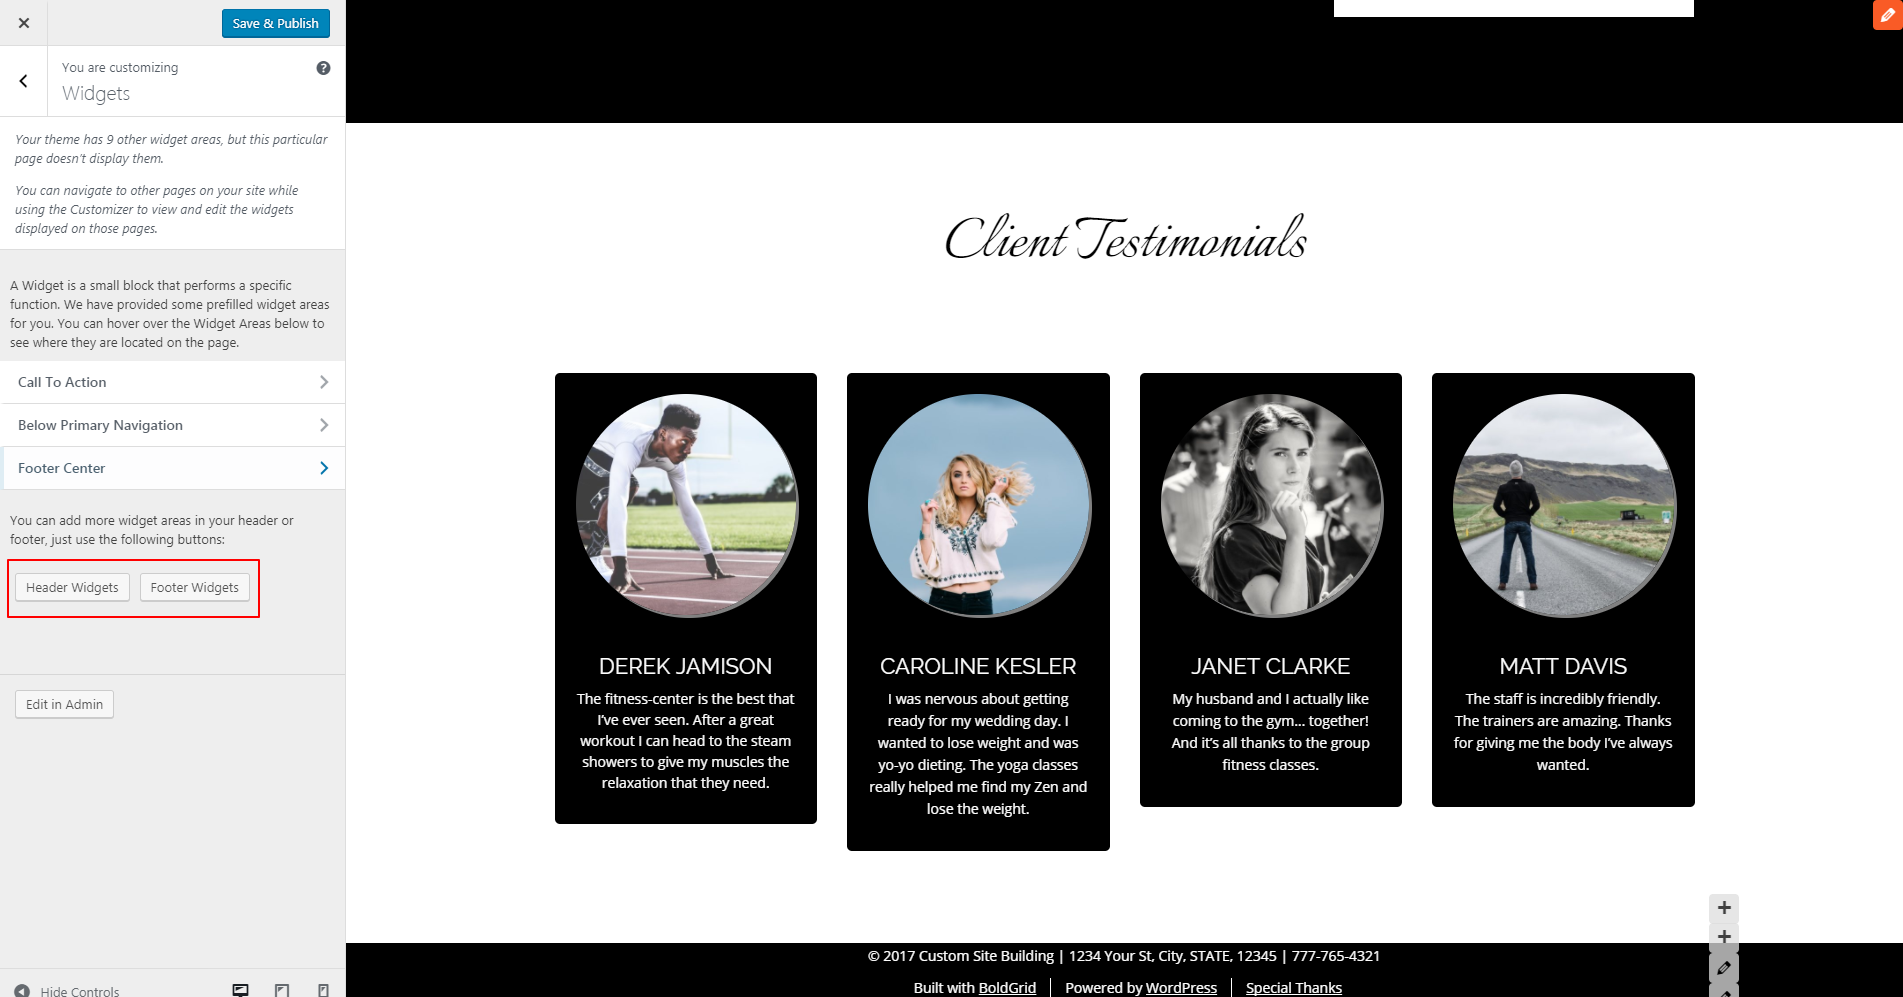 Click on “Header Widgets” and decide whether or not you would like to add more widgets to the header of your page. You can add up to four widgets in the header. To add a custom header widget, paste the custom HTML into the white box below “Custom Header HTML.”
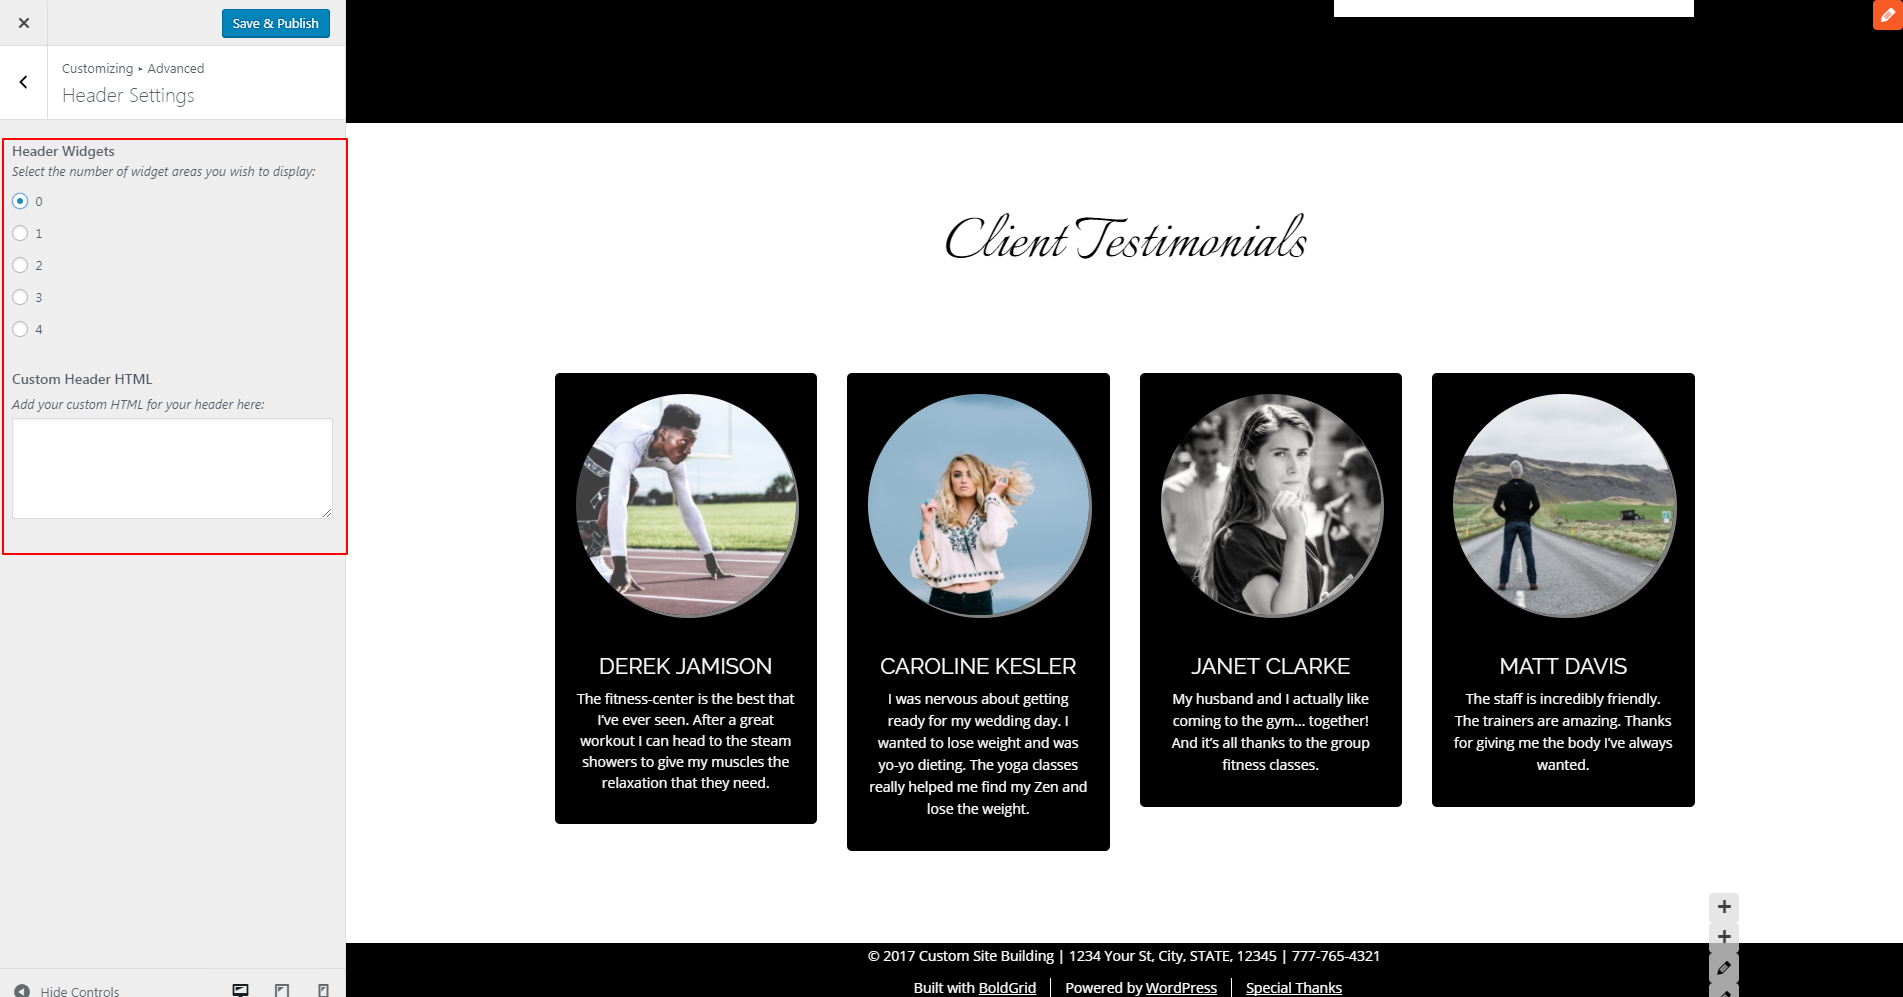 Go back to the main widgets menu in Customizer, then select “Footer Widgets.” You have the option to disable the footer by toggling “on” to “off,” which will remove all the options below the “Enable Footer” button.
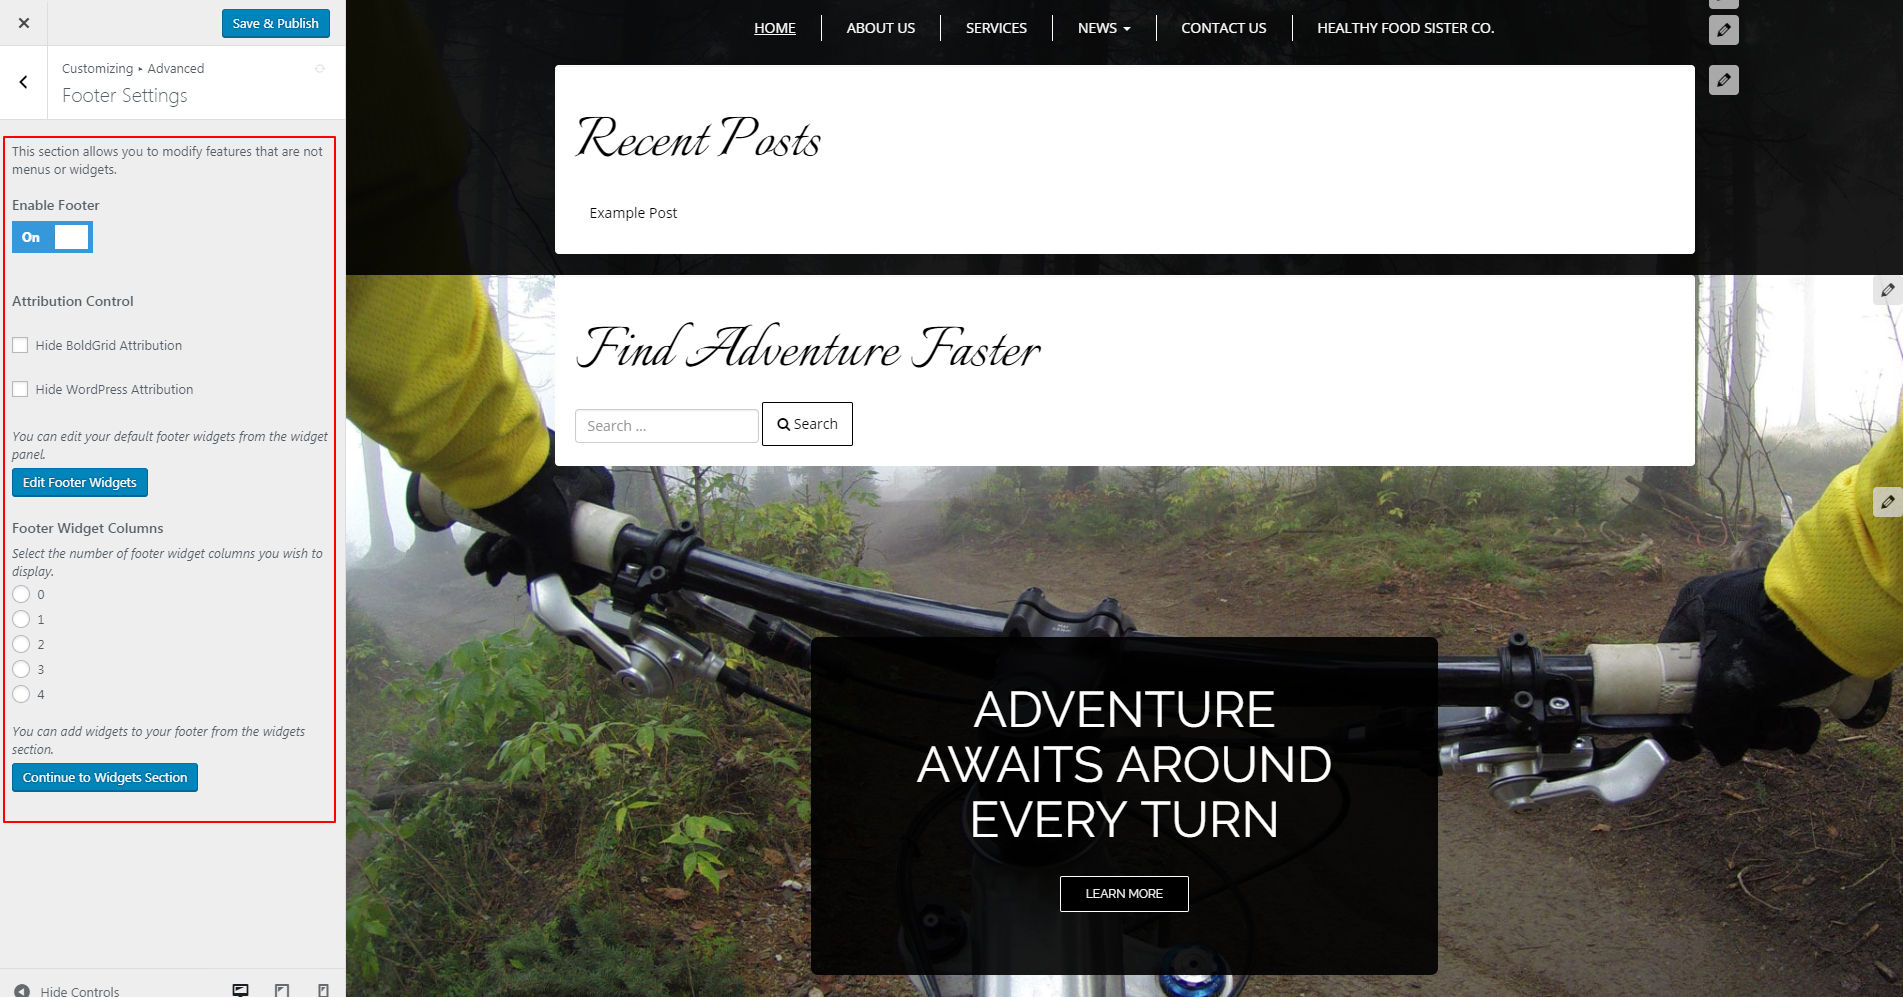 If you kept the footer widgets enabled, you will see “Attribution Control” options to hide the acknowledgment of this site as built with BoldGrid and powered by WordPress. Lastly, you can add up to four more footer widget columns at the bottom of your page by clicking the circle next to the corresponding number.
As always, click “Save & Publish” at the top of the Customizer menu to update your site.