Customizing Your Site Title and Logo
WordPress Page Builder
When you begin building a WordPress website using BoldGrid’s website builder, Customizing your site title and logo rank among the most important first steps for personalizing your brand. After you have chosen a new theme or imported an existing one, click “Customize” from the left side of your WordPress admin menu to be taken to BoldGrid’s Customizer page.

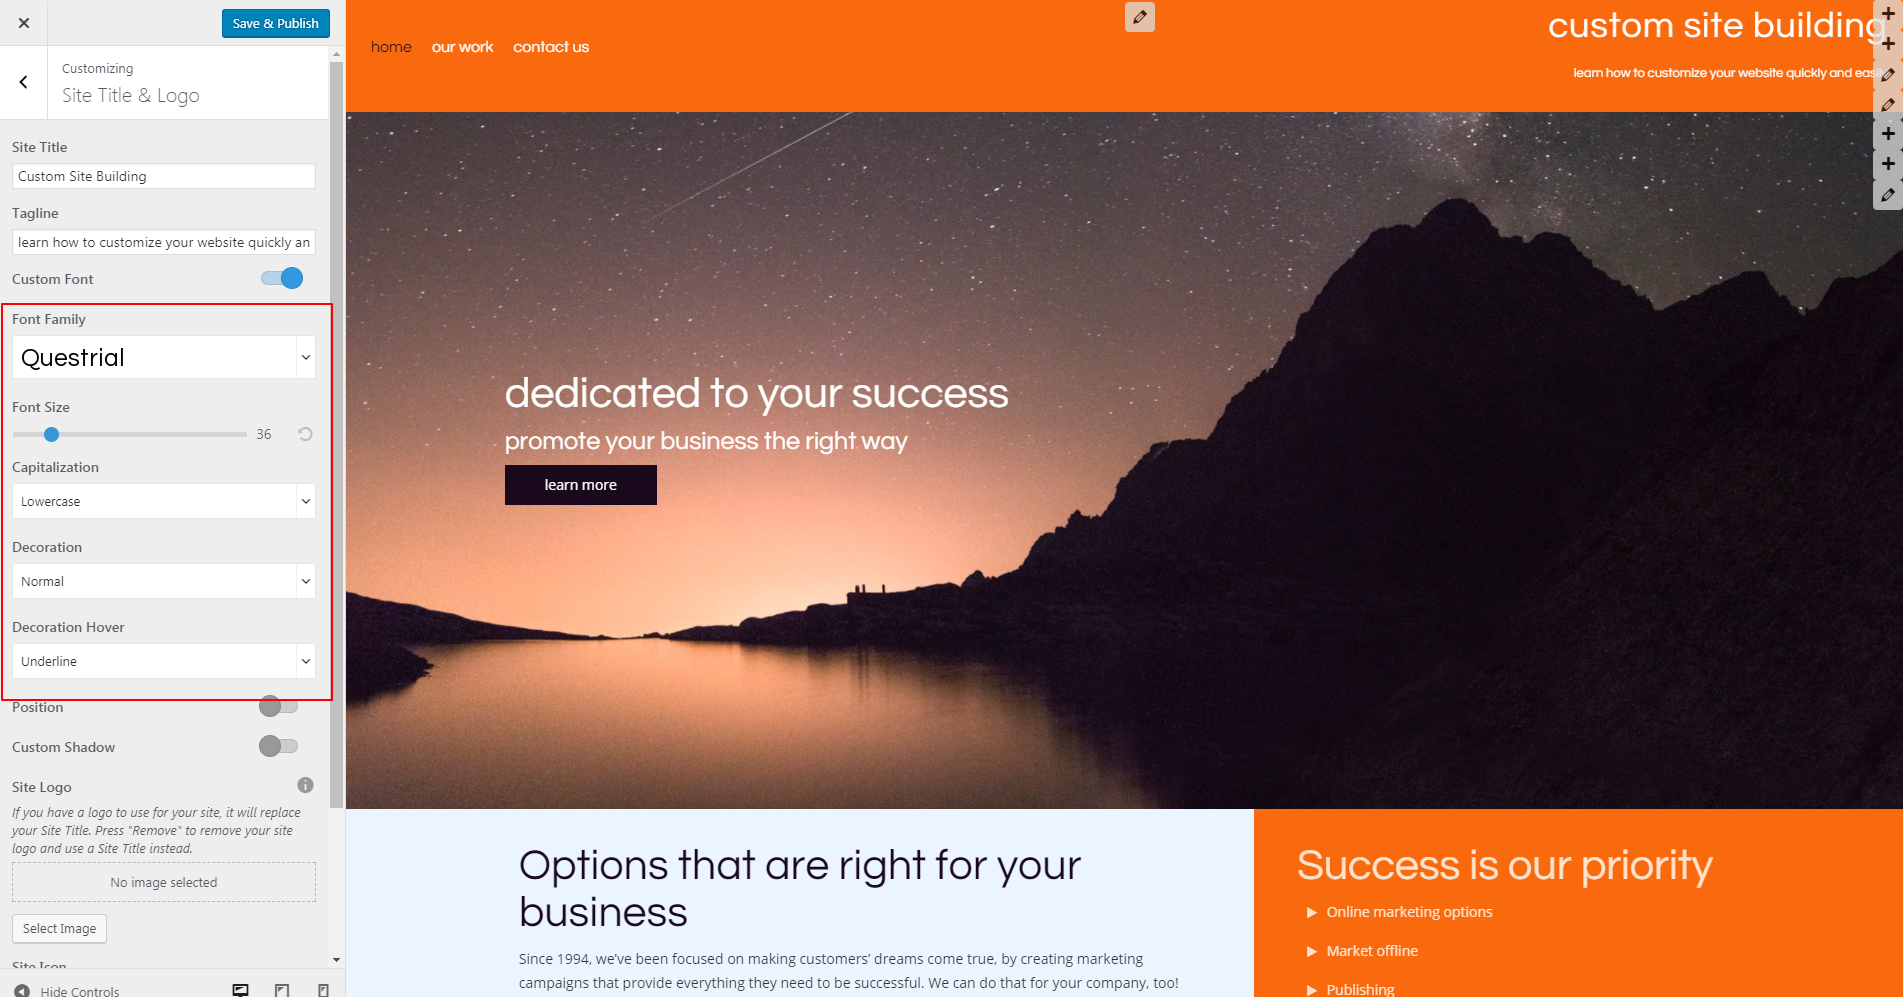
 “Font Family” has a drop down carrot that displays the font as it would appear on your website. Play around with various fonts here so you can see how the font looks with the rest of your content. This will only affect the title’s font, so choose one that represents your brand.
Next, you can increase or decrease the font size. You should consider how the font size you choose will appear on various screen sizes. For example, while the font might look great on a desktop, it could be too small or make the title too long to read clearly on a mobile device. When choosing the font size, an array of icons representing different standard screen sizes appear at the bottom of the Customizer menu. Choosing one will allow you to see a rendering of your site as it would appear on a screen of that size.
 Once satisfied with the specific font and size, you have four choices for “Capitalization” for the title: capitalize (only first letter of each word), lowercase or uppercase (all letters), or unmodified (will display exactly the way you type it).
“Decoration” has four options as well. “Normal” will not add any decorative lines, “Overline” places a line above the title text, “Underline” places a line beneath the text, and “Strikethrough” draws a line through the title text.
 “Horizontal Shadow” will change the shadowing effect from left to right by moving the slider in those directions. On the other hand, Dragging the “Vertical Shadow” button left will bring the shadow effect upward, while dragging it to the right will bring the shadow downward. Dragging the “Shadow Blur” button left will sharpen the shadow; dragging it right will make the shadow look out of focus behind the title text.
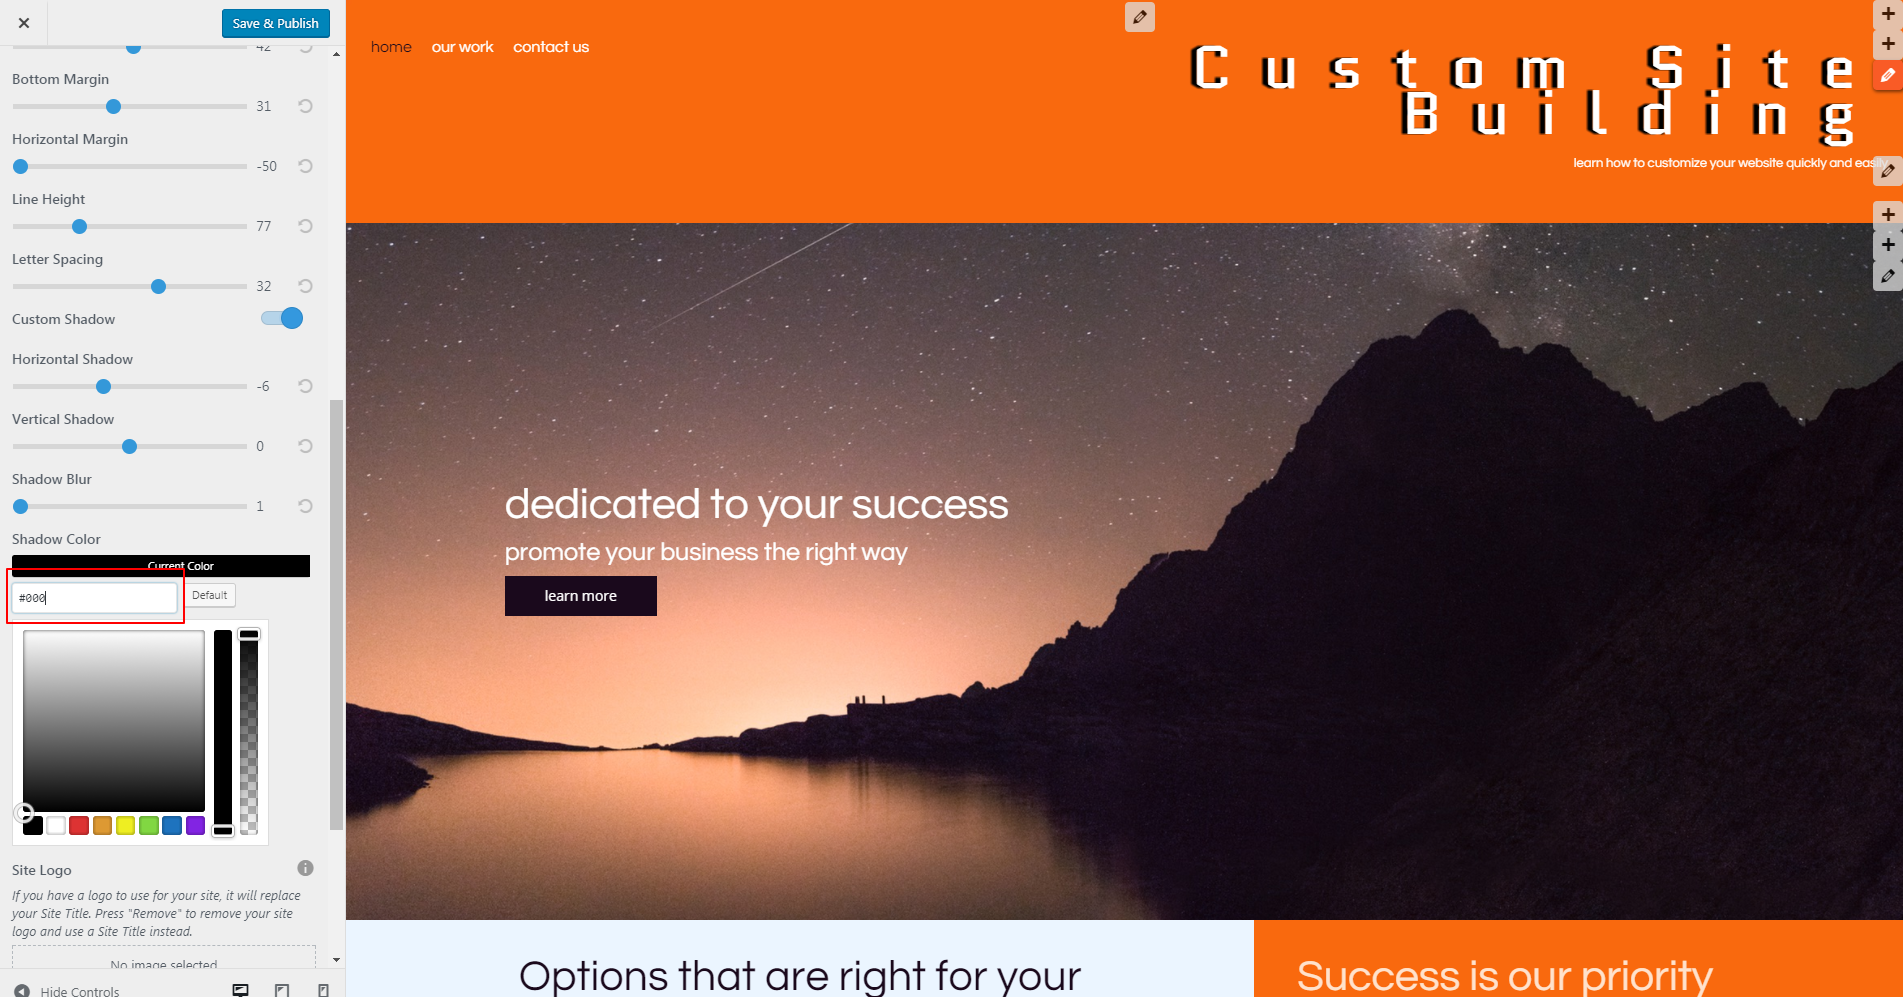
If you want to spice up this effect further, you can “Select Color” under “Shadow Color” to view a color palette. By default, the shadows color will be Black. If you have a specific color palette for your site or brand, you can choose the exact color you want by plugging in your hex code above the color palette box.

 When you are happy with your customized site title and logo, click “Save and Publish” at the top of the Customizer menu. It will gray out and change to the word “Saved” to confirm.
BoldGrid’s customizer provides you the opportunity to see changes as you make them and just as they will appear to your visitors on any device. Download BoldGrid today to begin customizing your site faster and more efficiently!
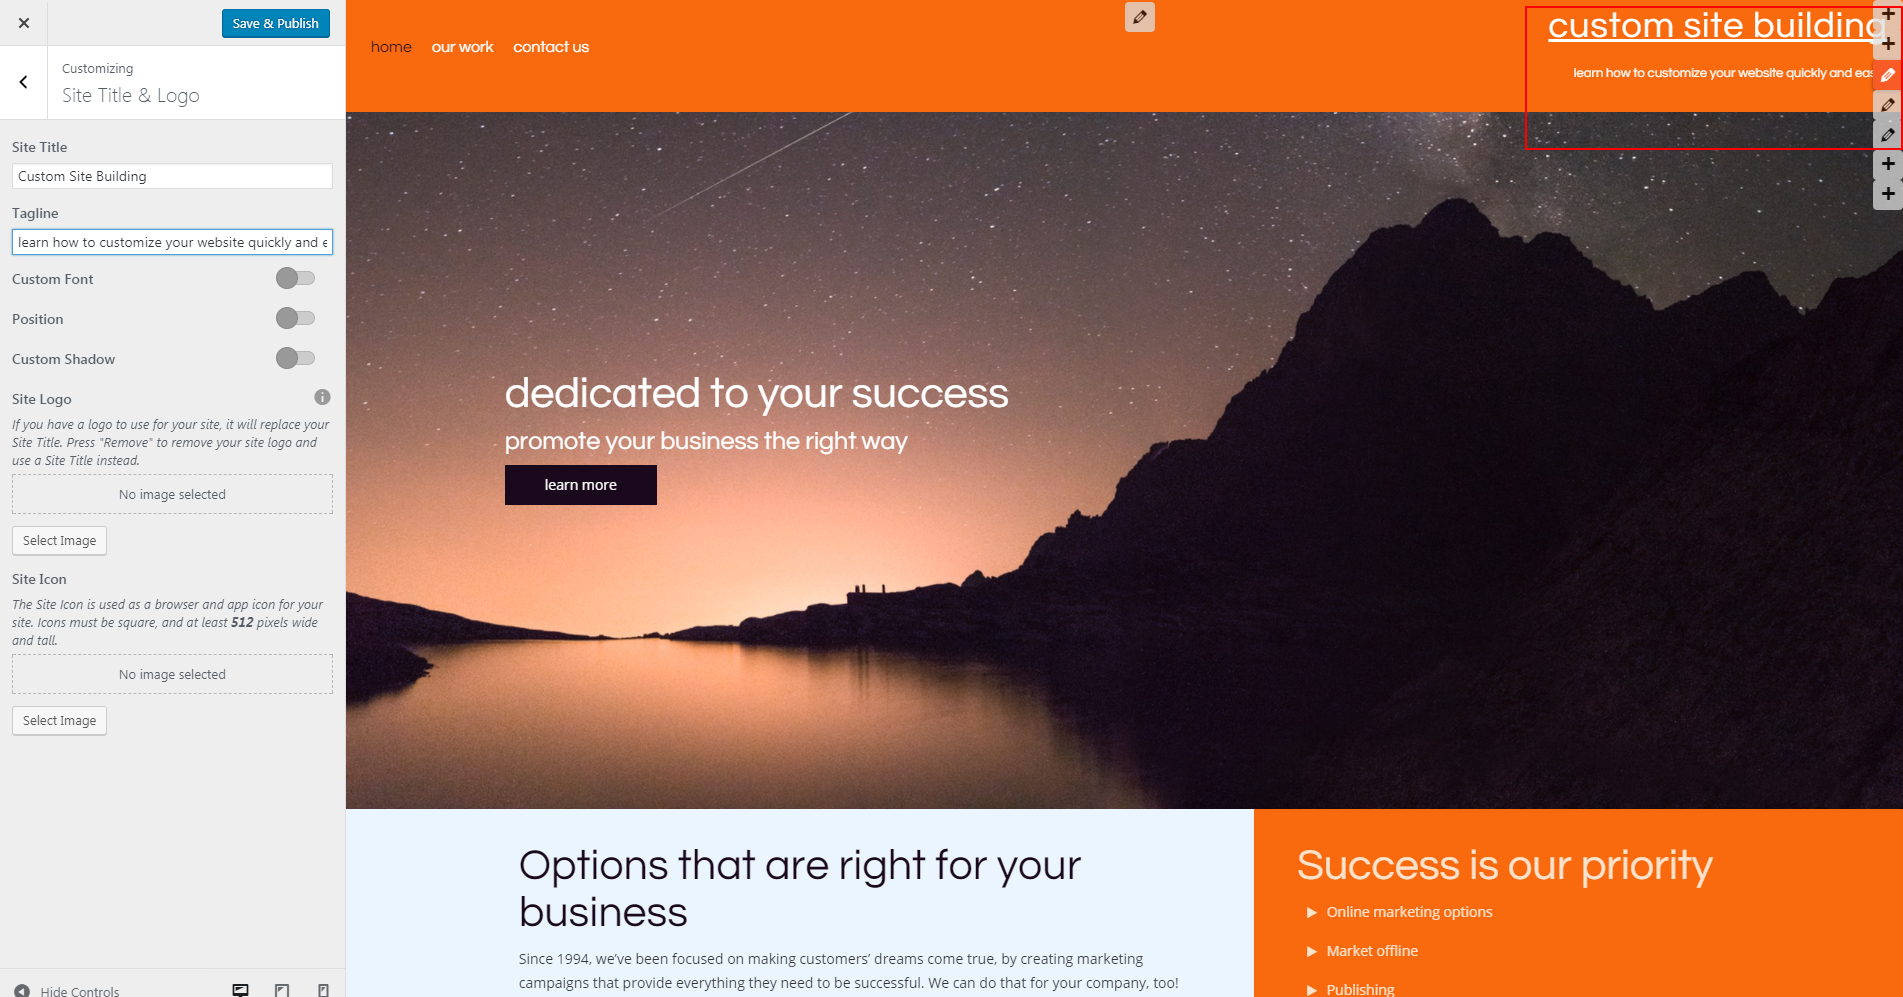
From here, select “Site Title & Logo” from the left-hand side to begin customizing your site.
Title & Tagline
Extremely important to your site, the title and tagline reflect how your site will be found in searches online. They also provide the first impression your site visitors will get of what your site. Choose a title that represents your brand or business, and a tagline that explains why this site exists in the first place. Simply click on the empty boxes beneath “Site Title” and “Tagline” from the left side of the Customizer and see your text appear in real time.
Customizing Font
After you have decided on a strong title and tagline, you can customize the font, its position, and add optional shadowing effects. To choose a custom font, click on the slider button on the left side of the Customizer menu. Clicking it will cause it to turn blue and shows you more options. “Font Family” has a drop down carrot that displays the font as it would appear on your website. Play around with various fonts here so you can see how the font looks with the rest of your content. This will only affect the title’s font, so choose one that represents your brand.
Next, you can increase or decrease the font size. You should consider how the font size you choose will appear on various screen sizes. For example, while the font might look great on a desktop, it could be too small or make the title too long to read clearly on a mobile device. When choosing the font size, an array of icons representing different standard screen sizes appear at the bottom of the Customizer menu. Choosing one will allow you to see a rendering of your site as it would appear on a screen of that size.
Customizing Position
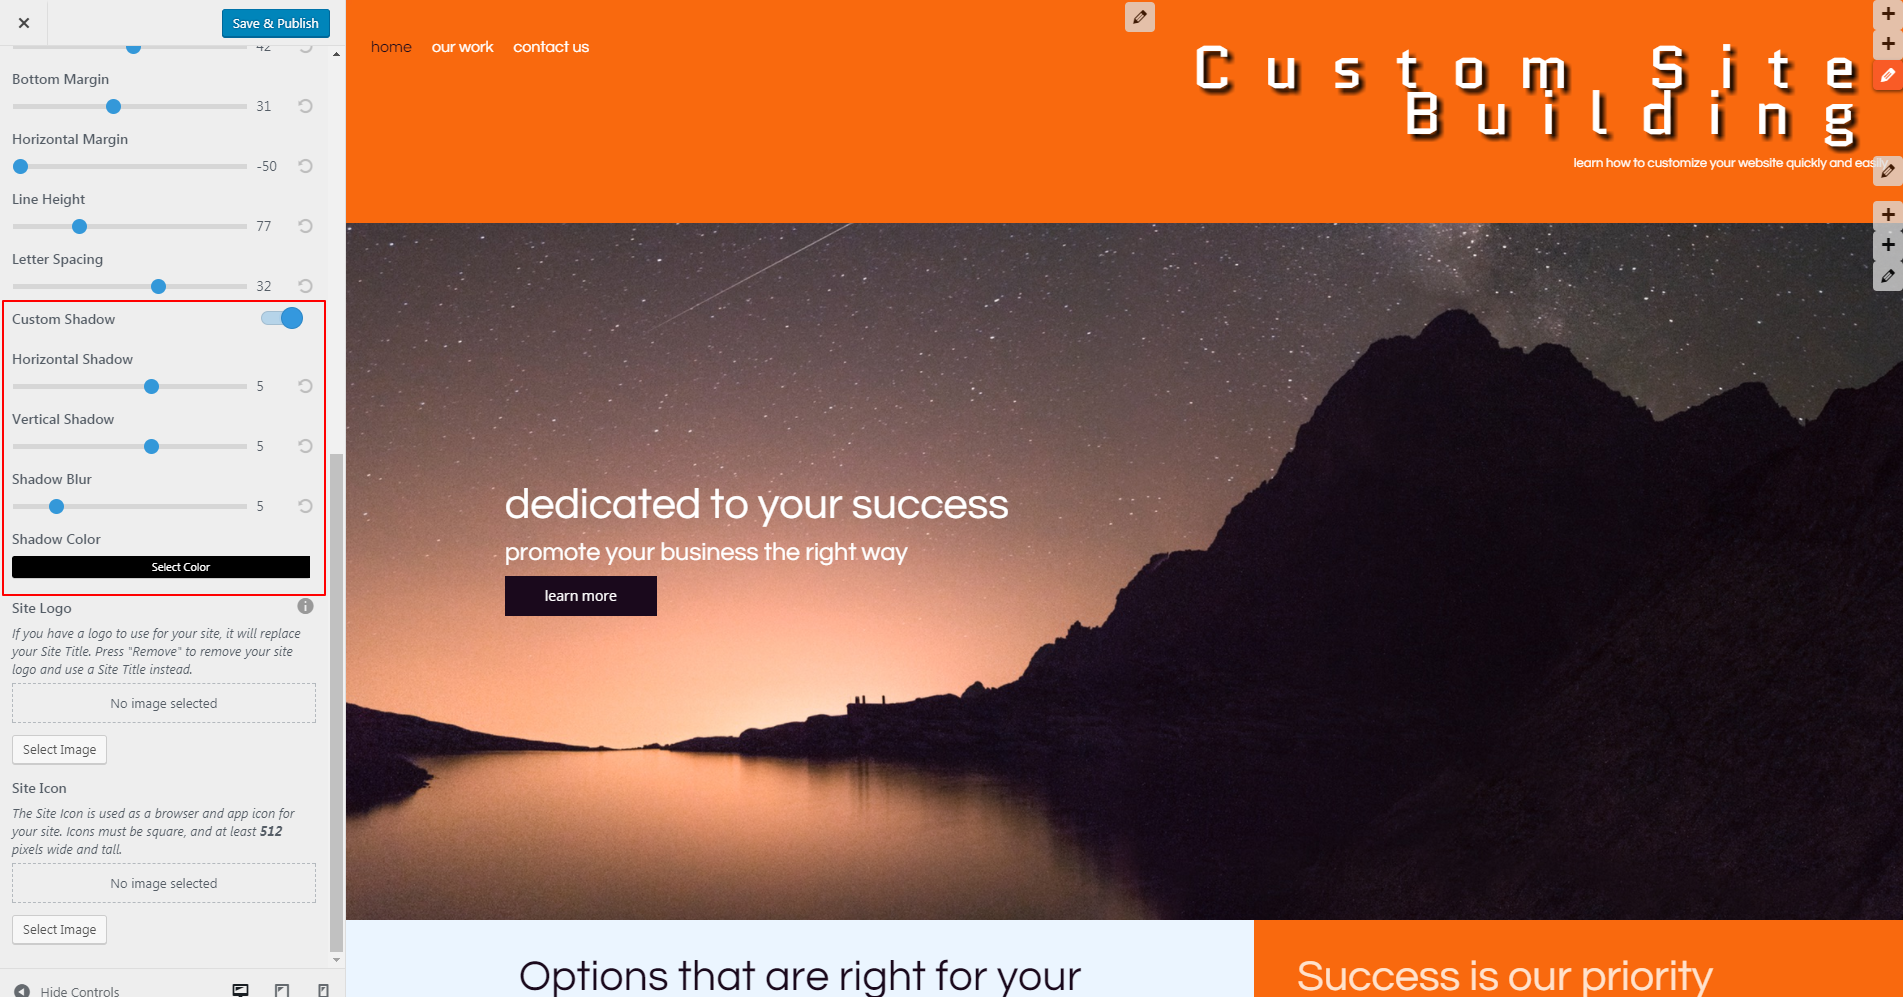
Customizing the position will change the space or margins between the lines of text in your title and the surrounding page elements, as well as the spacing between each of its letters. To customize these specifications, move the slider button next to “Position” to the right until it turns blue. If you want to increase or decrease the size of the first block where your site title, tagline and main navigation lies (first orange block in this example), move the blue button along the slider under “Top Margin” or “Bottom Margin.” These changes will affect the space vertically, while “Horizontal Margin” will change the space left to right. On the other hand, you may only want to change the spacing between lines of text or letters. “Line Height” creates or reduces space between your title and tagline. Similarly, “Letter Spacing” will increase or decrease the space in between each letter of text in your title. Again, utilize the device views to visualize how this display would vary on someone’s phone, tablet, or desktop.Custom Shadowing Your Title
When you turn the “Custom Shadow” button to blue, you will immediately see the shadowing effects on your site title. However, you can further customize these shadow effects (including the color of the shadow) from the left-hand menu. “Horizontal Shadow” will change the shadowing effect from left to right by moving the slider in those directions. On the other hand, Dragging the “Vertical Shadow” button left will bring the shadow effect upward, while dragging it to the right will bring the shadow downward. Dragging the “Shadow Blur” button left will sharpen the shadow; dragging it right will make the shadow look out of focus behind the title text.
If you want to spice up this effect further, you can “Select Color” under “Shadow Color” to view a color palette. By default, the shadows color will be Black. If you have a specific color palette for your site or brand, you can choose the exact color you want by plugging in your hex code above the color palette box.
