
The Total Upkeep WordPress plugin helps you focus on productivity with options to automate theme and plugin updates and restore backups when updates are unsuccessful. The following will guide you through configuring automatic WordPress updates with Total Upkeep.
Set Up Automatic WordPress Updates
- In the Dashboard, Navigate to Total Upkeep → Settings
- Select Auto Updates
- Enable Auto Backup before updates
- Specify WordPress Core update types to auto-update
- Specify Plugins to auto-update
- Specify Themes to auto-update
Congratulations! You now know how to configure Automatic WordPress Updates for your BoldGrid website to help protect you from issues that can occur when upgrading. Now is a great time to take your first backup, to ensure you have a restore point at any time in the future.
How to Enable Auto Updates and Rollback options in Total Upkeep
The Total Upkeep backup plugin for WordPress provides peace of mind for updates to your themes and plugins by providing an option to automatically update, backup and rollback the updates. This option checks your installation to make sure that the installation can occur without any problems, then automatically runs the update process. The older plugins and themes are backed up before the update process. If there is a problem with a theme or plugin update then it is automatically rolled back to the previous version. Follow the instructions below in order to enable or disable the options.
- Login to the BoldGrid Administrator Dashboard
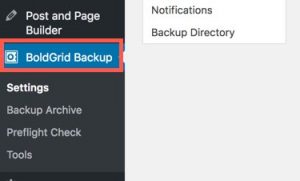
 Scroll down to the Total Upkeep menu
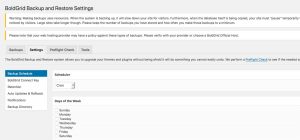
 Select Settings. You will then see the Total Upkeep and Restore Settings page.
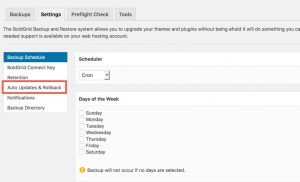
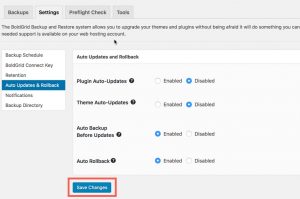
  In the menu under the Settings tab you will see an option labeled Auto Updates & Rollback. Click on Auto Updates & Rollback.
 -
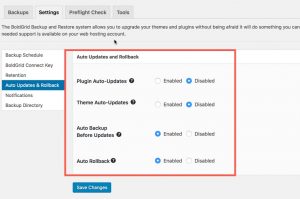
 There are four options that you can set in the Auto Updates and Rollback menu: Plugin Auto-Updates, Theme Auto-Updates, Auto Backup Before Updates and Auto Rollback. Click on the radial button beside each option to enable or disable them.
  Click on the Save Changes button at the bottom of the page in order to save any changes.
You can now enable the Auto Updates and Rollback options for your plugins and themes using the Total Upkeep WordPress backup plugin. Next, you may want to learn about the additional tools in Total Upkeep to keep your WordPress website safe and secure.
How to Configure Timely Auto Updates in Total Upkeep
Keeping your WordPress site up to date is extremely important, but occasionally plugin updates may have unexpected bugs. Not only can the Total Upkeep plugin keep you safe by saving a backup before WordPress updates, you can also configure your plugins to update after giving the developers enough time to work out any bugs in a new release.
Timely auto-updates allow you to specify a number of days to wait, after a plugin or theme update becomes available, before updating your site.
To configure how long to wait after a theme or plugin’s update is released before installing the update, follow these steps:
- In your WordPress Dashboard, navigate to Total Upkeep -> Settings
- Select the Auto Updates tab:

- Next to the option “Timely Auto Updates” select “Enabled.”
- Next to the option “When To Perform Updates” select the number of days you wish to wait after an update is released.
- To configure which plugins, themes, and WordPress Core Updates are automatically updated, you can toggle them on or off in the section below:

- After making the desired changes, be sure to click on Save Changes below.
SIGNUP FOR
BOLDGRID CENTRAL
200+ Design Templates + 1 Kick-ass SuperTheme
6 WordPress Plugins + 2 Essential Services
Everything you need to build and manage WordPress websites in one Central place.


Luciano says:
I’ve scheduled backup once a week.
But a backup is performed evey day.
This is because automatic update is enabled?
brad says:
Hi Luciano, thanks for your question!
Are your backups being run because of auto updates? You can see what triggered a backup by going to Total Upkeep > Backup Archives > and clicking on “View details” for a backup. Then click “Show” next to “More info”.
You should see a section that says “Backup triggered by”.
I created a video to show you exactly what I am referring to:
I hope this helps.
Thanks!
– Brad