The Always Cached feature enhances the Page Cache by blocking immediate flush actions and queuing them for manual or scheduled processing via WP cron. This optimization is especially beneficial for high-traffic sites with frequent content updates, as it prevents cache modifications during peak traffic times, thus improving performance.
Example: Without and With Always Cached
Without Always Cached:
- You Update Your Homepage: As soon as you make an update, the cache for the homepage is cleared.
- Multiple Visitors Access the Homepage: Let’s say 10 people visit your homepage simultaneously right after the update.
- Cache Rebuild Conflicts: Each visit triggers the site to rebuild and save the cached page. This simultaneous action can cause delays, conflicts, and increased server load, potentially slowing down your site or causing errors.
With Always Cached Enabled:
- You Update Your Homepage: The update is made, but the existing cache file is kept in place.
- Queueing the Update: The changes are added to a queue to be processed by WP cron later.
- Serving Cached Content: When 10 people visit your homepage simultaneously after the update, they are served the existing cached version, preventing immediate rebuild conflicts.
- Scheduled Cache Update: WP cron processes the queued updates at scheduled intervals, ensuring that only one update happens at a time, which improves performance and stability.
Enabling Always Cached
To enable the Always Cached feature:- Navigate to Performance > Extensions in your WordPress admin panel.
- Enable the Always Cached extension.

Configuring Always Cached
To configure the Always Cached feature:- Click the Settings link from the extensions page or navigate to the Page Cache Queue page via the left sidebar menu.
Queue Manager
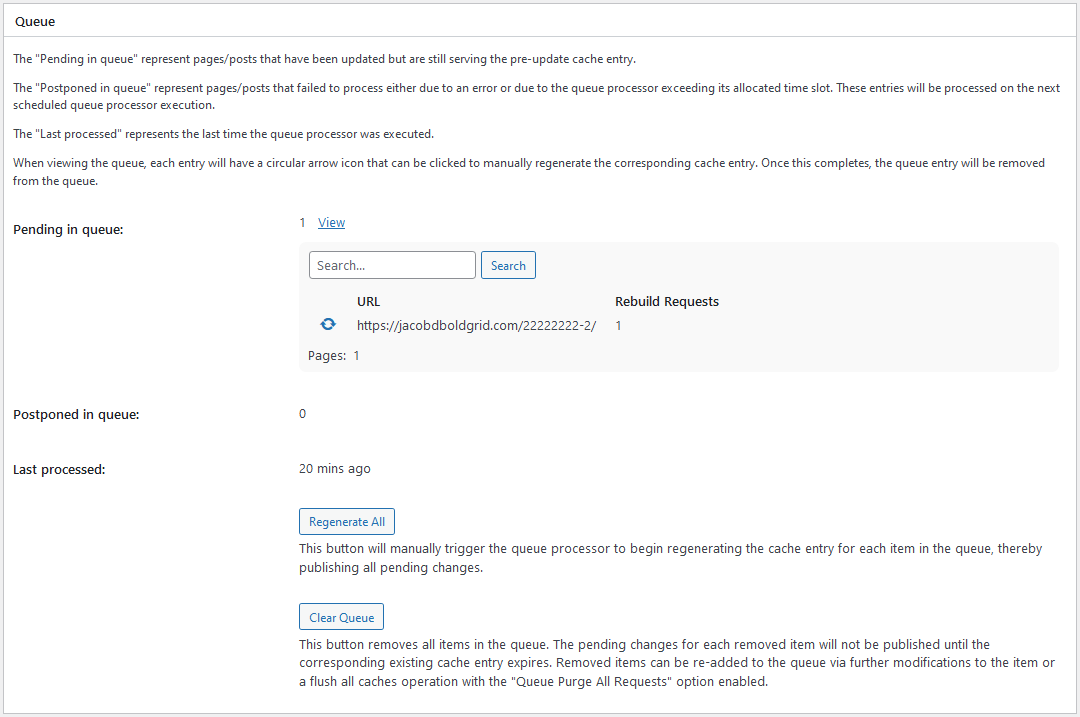
The first section of the Page Cache Queue page is the Queue Manager, where you can:- Review all items in the queue.
- Manually process individual entries or all entries using the Regenerate All button.
- Clear the queue without processing.

Exclusions
In the Exclusions section, you can define URLs that should be excluded from the Always Cached queue. Any pages/posts that match entries in this section will be handled normally by W3 Total Cache. In other words, the cache entry will be purged when updating a page/post or when purging all caches or the page cache.

Cron Configuration
In the Cron section, you can enable a WP Cron event to process the queue at a given time and interval. The Start Time selection controls when the event will start and the Interval controls how often the event will occur. Intervals include:- Hourly
- Twice Daily
- Daily
- Weekly

Purge All Behavior
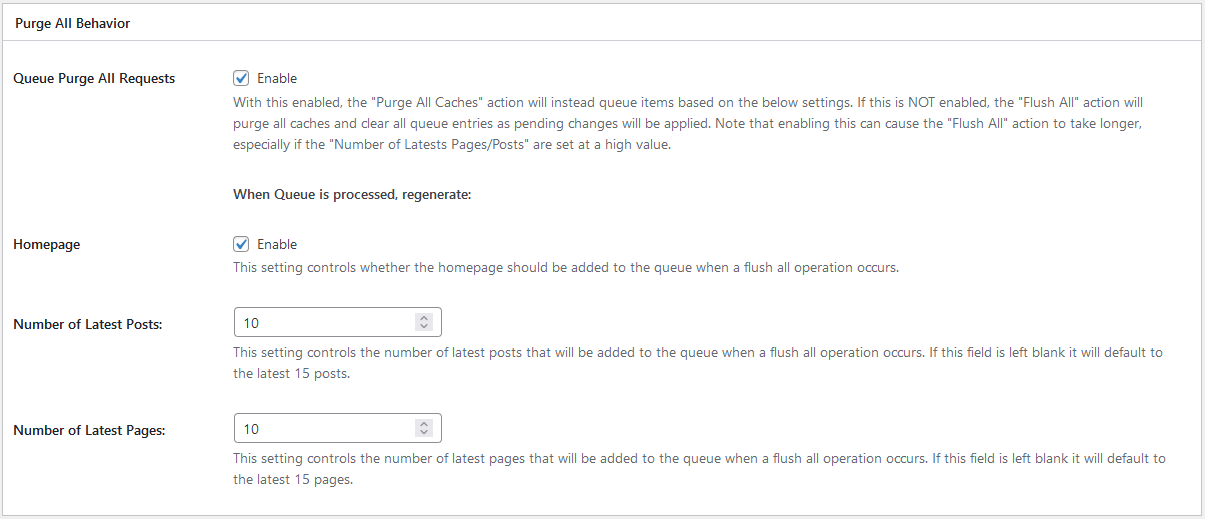
By default, the “Flush All” action clears all cache entries and existing queue items. Enabling the Queue Purge All Requests setting changes this behavior to add all pages/posts to the queue instead. Additional settings allow you to refine what entries are added to the queue on a Queue Purge All Requests:- Add the homepage to the queue.
- Control the number of recent pages/posts added.

W3 Total Cache
You haven't seen fast until you've tried PRO
Full Site CDN + Additional Caching Options
Advanced Caching Statistics, Purge Logs and More
Everything you need to scale your WordPress Website and improve your PageSpeed.
